100%
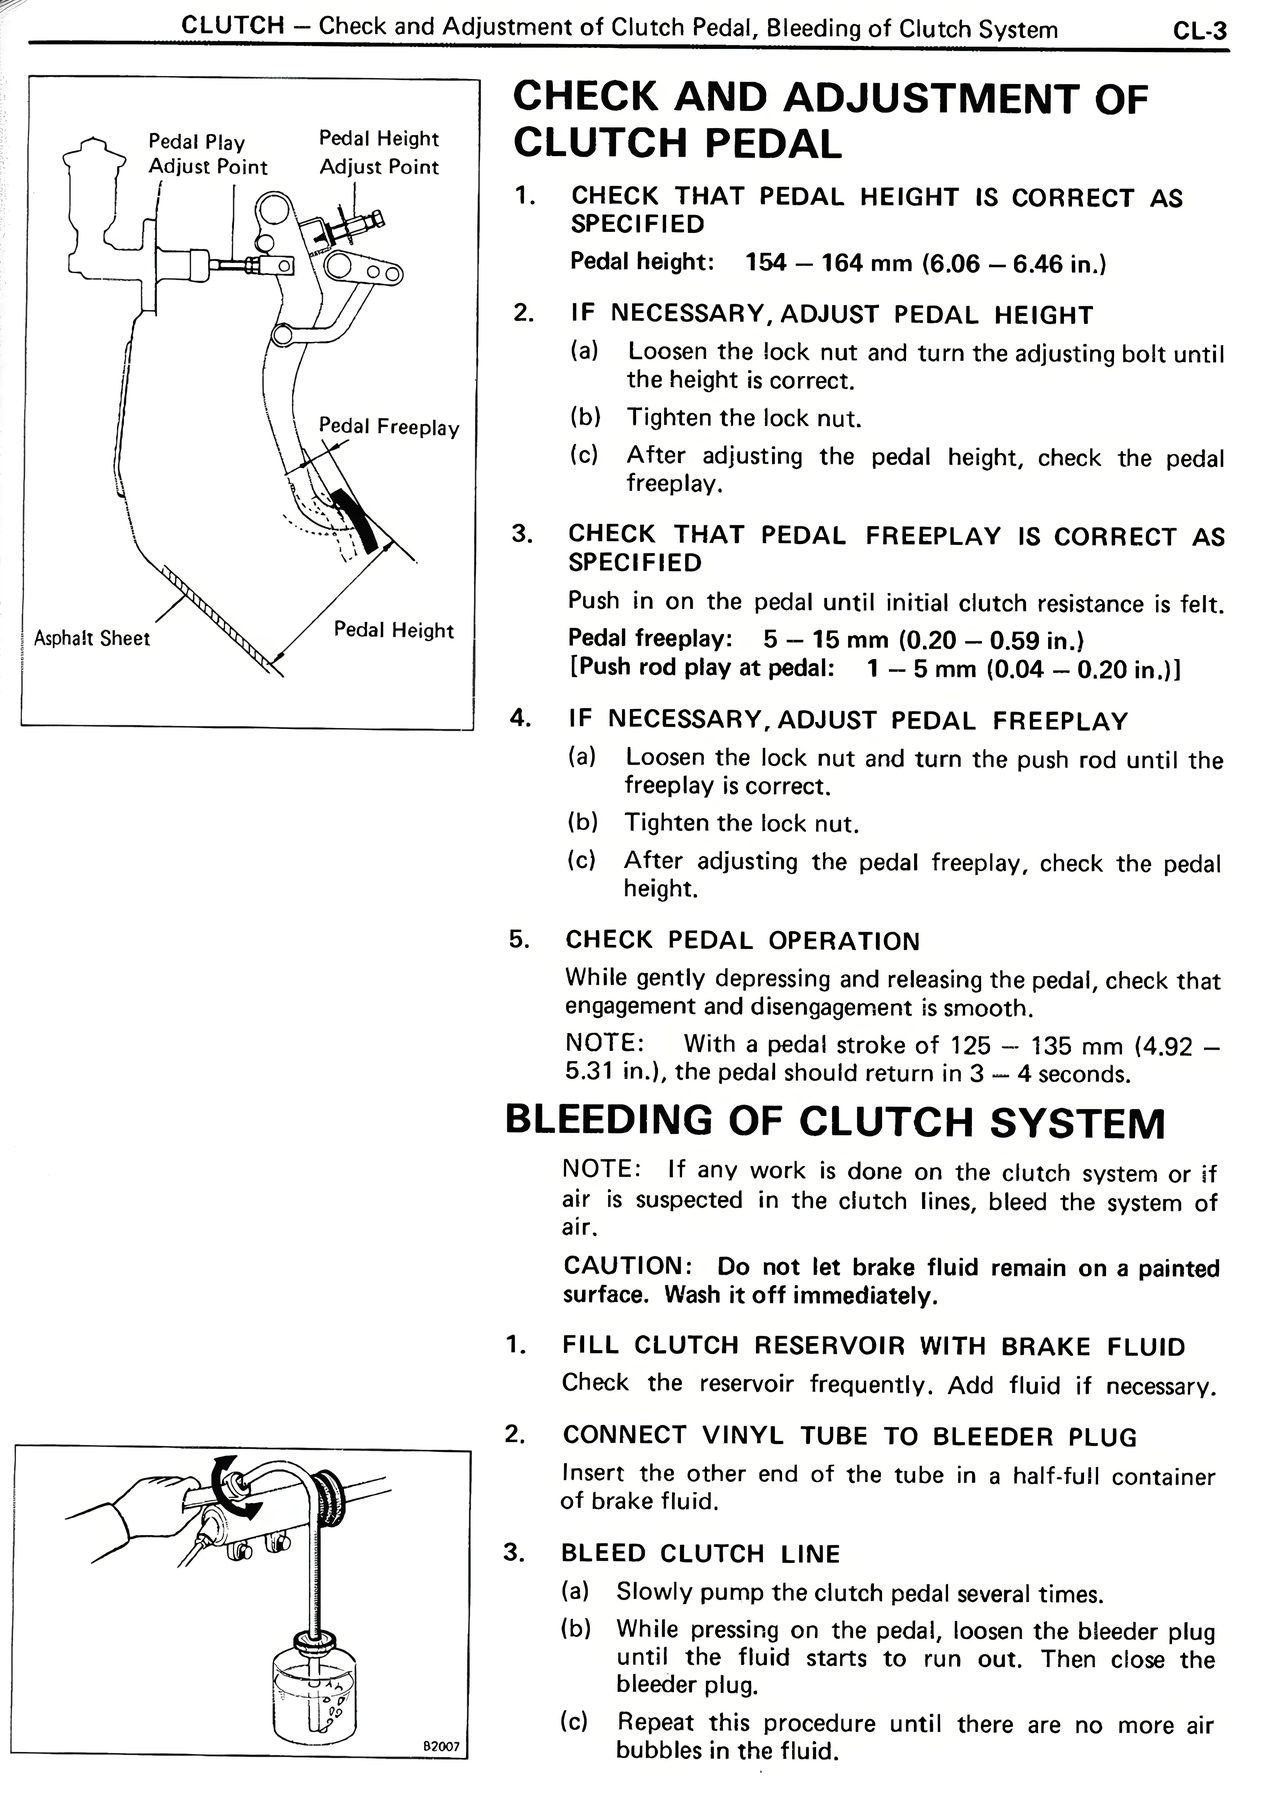
CHECK AND ADJUSTMENT OF CLUTCH PEDAL
1. CHECK THAT PEDAL HEIGHT IS CORRECT AS SPECIFIED
Pedal height: 154 – 164 mm (6.06 – 6.46 in.)
2. IF NECESSARY, ADJUST PEDAL HEIGHT
(a) Loosen the lock nut and turn the adjusting bolt until the height is correct.
(b) Tighten the lock nut.
(c) After adjusting the pedal height, check the pedal freeplay.
3. CHECK THAT PEDAL FREEPLAY IS CORRECT AS SPECIFIED
Push in on the pedal until initial clutch resistance is felt.
Pedal freeplay: 5 – 15 mm (0.20 – 0.59 in.)
[Push rod play at pedal: 1 – 5 mm (0.04 – 0.20 in.)]
4. IF NECESSARY, ADJUST PEDAL FREEPLAY
(a) Loosen the lock nut and turn the push rod until the freeplay is correct.
(b) Tighten the lock nut.
(c) After adjusting the pedal freeplay, check the pedal height.
5. CHECK PEDAL OPERATION
While gently depressing and releasing the pedal, check that engagement and disengagement is smooth.
NOTE: With a pedal stroke of 125 – 135 mm (4.92 – 5.31 in.), the pedal should return in 3 – 4 seconds.
BLEEDING OF CLUTCH SYSTEM
NOTE: If any work is done on the clutch system or if air is suspected in the clutch lines, bleed the system of air.
CAUTION: Do not let brake fluid remain on a painted surface. Wash it off immediately.
1. FILL CLUTCH RESERVOIR WITH BRAKE FLUID
Check the reservoir frequently. Add fluid if necessary.
2. CONNECT VINYL TUBE TO BLEEDER PLUG
Insert the other end of the tube in a half-full container of brake fluid.
3. BLEED CLUTCH LINE
(a) Slowly pump the clutch pedal several times.
(b) While pressing on the pedal, loosen the bleeder plug until the fluid starts to run out. Then close the bleeder plug.
(c) Repeat this procedure until there are no more air bubbles in the fluid.