100%
Stop Light Switch
INSPECTION OF SWITCH
INSPECT SWITCH CONTINUITY
Inspect the switch continuity between terminals.
Terminal
Switch position 1 2 3 4
Switch free O---- ----O
Switch pin pushed O---- ----O
If continuity is not as specified, replace the switch.
Actuator
INSPECTION OF SENSOR
1. INSPECT ACTUATOR RESISTANCE
Measure the resistance value between terminals as follows.
Resistance: 3 — 2 approx. 30 Ω
1 — 3 approx. 65 Ω
If the resistance value is not as specified, replace the actuator.
2. INSPECT ACTUATOR OPERATION
(a) Connect the positive (+) lead from battery to terminals 2 and 1, and the negative (—) lead to terminal 3.
(b) Slowly apply vacuum from 0 — 300 mmHg (0 — 11.81 in.Hg, 0 — 40.0 kPa), and check that the control cable can be pulled smoothly.
(c) Disconnect terminal 2 or 1 and check that the control cable returns to its original position and the vacuum returns to 0 mmHg (0 in.Hg, 0 kPa).
If operation is not as specified, replace the actuator.
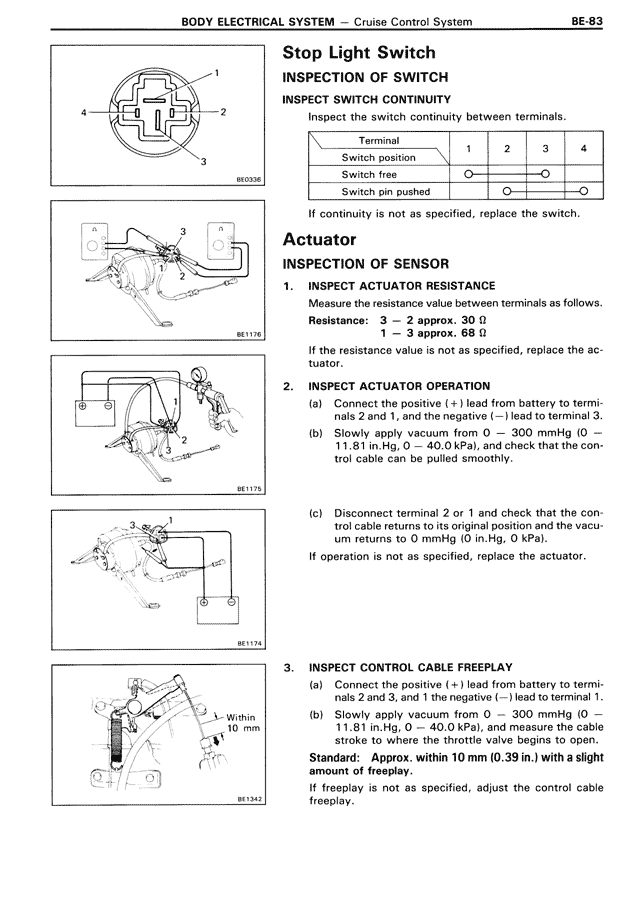
3. INSPECT CONTROL CABLE FREEPLAY
(a) Connect the positive (+) lead from battery to terminals 2 and 3, and 1 the negative (—) lead to terminal 1.
(b) Slowly apply vacuum from 0 — 300 mmHg (0 — 11.81 in.Hg, 0 — 40.0 kPa), and measure the cable stroke to where the throttle valve begins to open.
Standard: Approx. within 10 mm (0.39 in.) with a slight amount of freeplay.
If freeplay is not as specified, adjust the control cable freeplay.