100%
7. INSPECT RELEASE BEARING
Turn the bearing by hand while applying force in the axial direction.
If the bearing sticks or has much resistance, replace the release bearing.
HINT: The bearing is permanently lubricated and requires no cleaning or lubrication.
8. IF NECESSARY, REPLACE RELEASE BEARING (7M-GE)
Replace release bearing assembly.
(7M-GTE)
(a) Using snap ring pliers, remove the snap ring.
(b) Remove the release bearing, plate washer and cone spring from the hub.
(c) Install the cone spring, plate washer and a new release bearing to the hub.
HINT: Make sure to install the cone spring in correct direction as shown in the figure.
(d) Using snap ring pliers, install the snap ring.
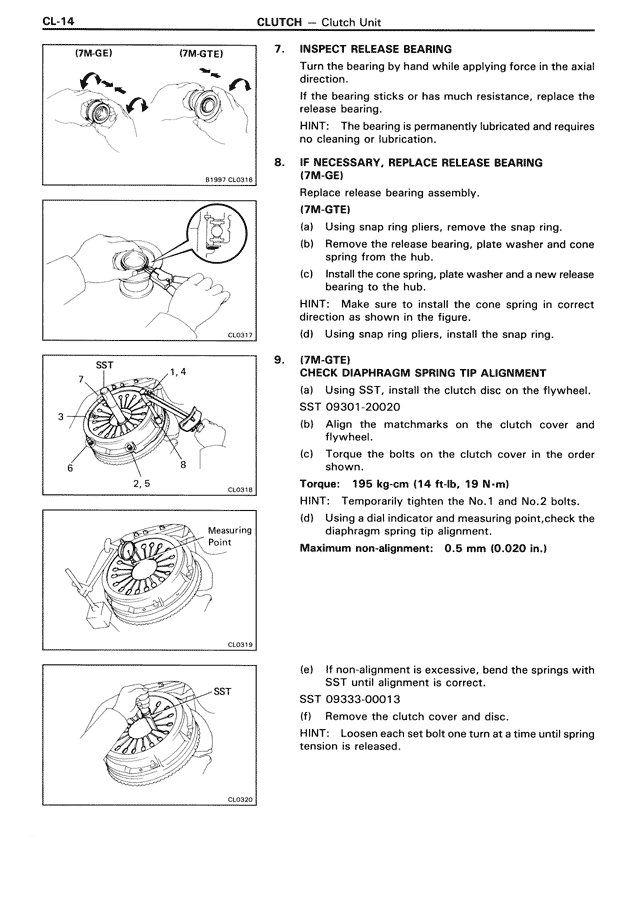
9. (7M-GTE)
CHECK DIAPHRAGM SPRING TIP ALIGNMENT
(a) Using SST, install the clutch disc on the flywheel.
SST 09301-20020
(b) Align the matchmarks on the clutch cover and flywheel.
(c) Torque the bolts on the clutch cover in the order shown.
Torque: 195 kg-cm (14 ft-lb, 19 N-m)
HINT: Temporarily tighten the No.1 and No.2 bolts.
(d) Using a dial indicator and measuring point, check the diaphragm spring tip alignment.
Maximum non-alignment: 0.5 mm (0.020 in.)
(e) If non-alignment is excessive, bend the springs with SST until alignment is correct.
SST 09333-00013
(f) Remove the clutch cover and disc.
HINT: Loosen each set bolt one turn at a time until spring tension is released.