100%
Front and Rear Actuator
1. PREPARATION FOR REMOVAL
(a) Ignition switch on and mode select switch at "SPORT" position.
(b) Service connector (Diagnosis) terminals T5 and E1 short circuited.
(c) In this condition, turn the ignition switch off, and remove the battery negative terminal.
2. REMOVE ACTUATOR
(a) Disconnect the actuator connector.
(b) Remove the actuator cover. (Front only)
(c) Remove the two actuator mounting bolts and pull out the actuator from the shock absorber.
HINT: Pull the actuator out slowly straight and slowly to prevent bending the absorber control rod.
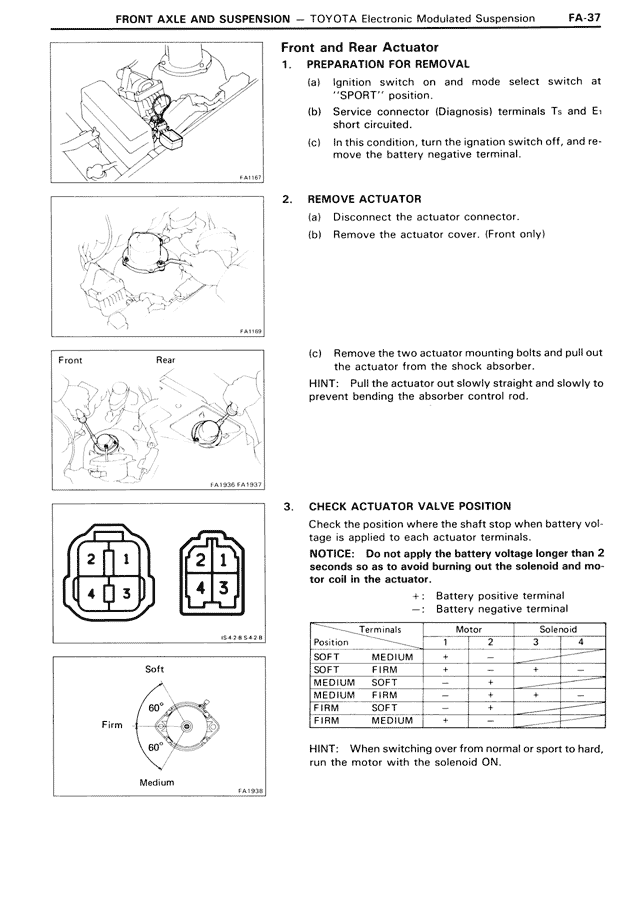
3. CHECK ACTUATOR VALVE POSITION
Check the position where the shaft stop when battery voltage is applied to each actuator terminals.
NOTICE: Do not apply the battery voltage longer than 2 seconds so as to avoid burning out the solenoid and motor coil in the actuator.
+: Battery positive terminal
-: Battery negative terminal
Terminals Motor Solenoid
Position 1 2 3 4
SOFT MEDIUM + - 2 3 4
SOFT FIRM - + +
MEDIUM SOFT - +
MEDIUM FIRM + - +
FIRM SOFT + - +
FIRM MEDIUM + -
HINT: When switching over from normal or sport to hard, run the motor with the solenoid ON.
Soft
60°
Firm
60°
Medium