100%
CL–15
CLUTCH – CLUTCH UNIT (2JZ–GTE)
CLUTCH UNIT INSTALLATION
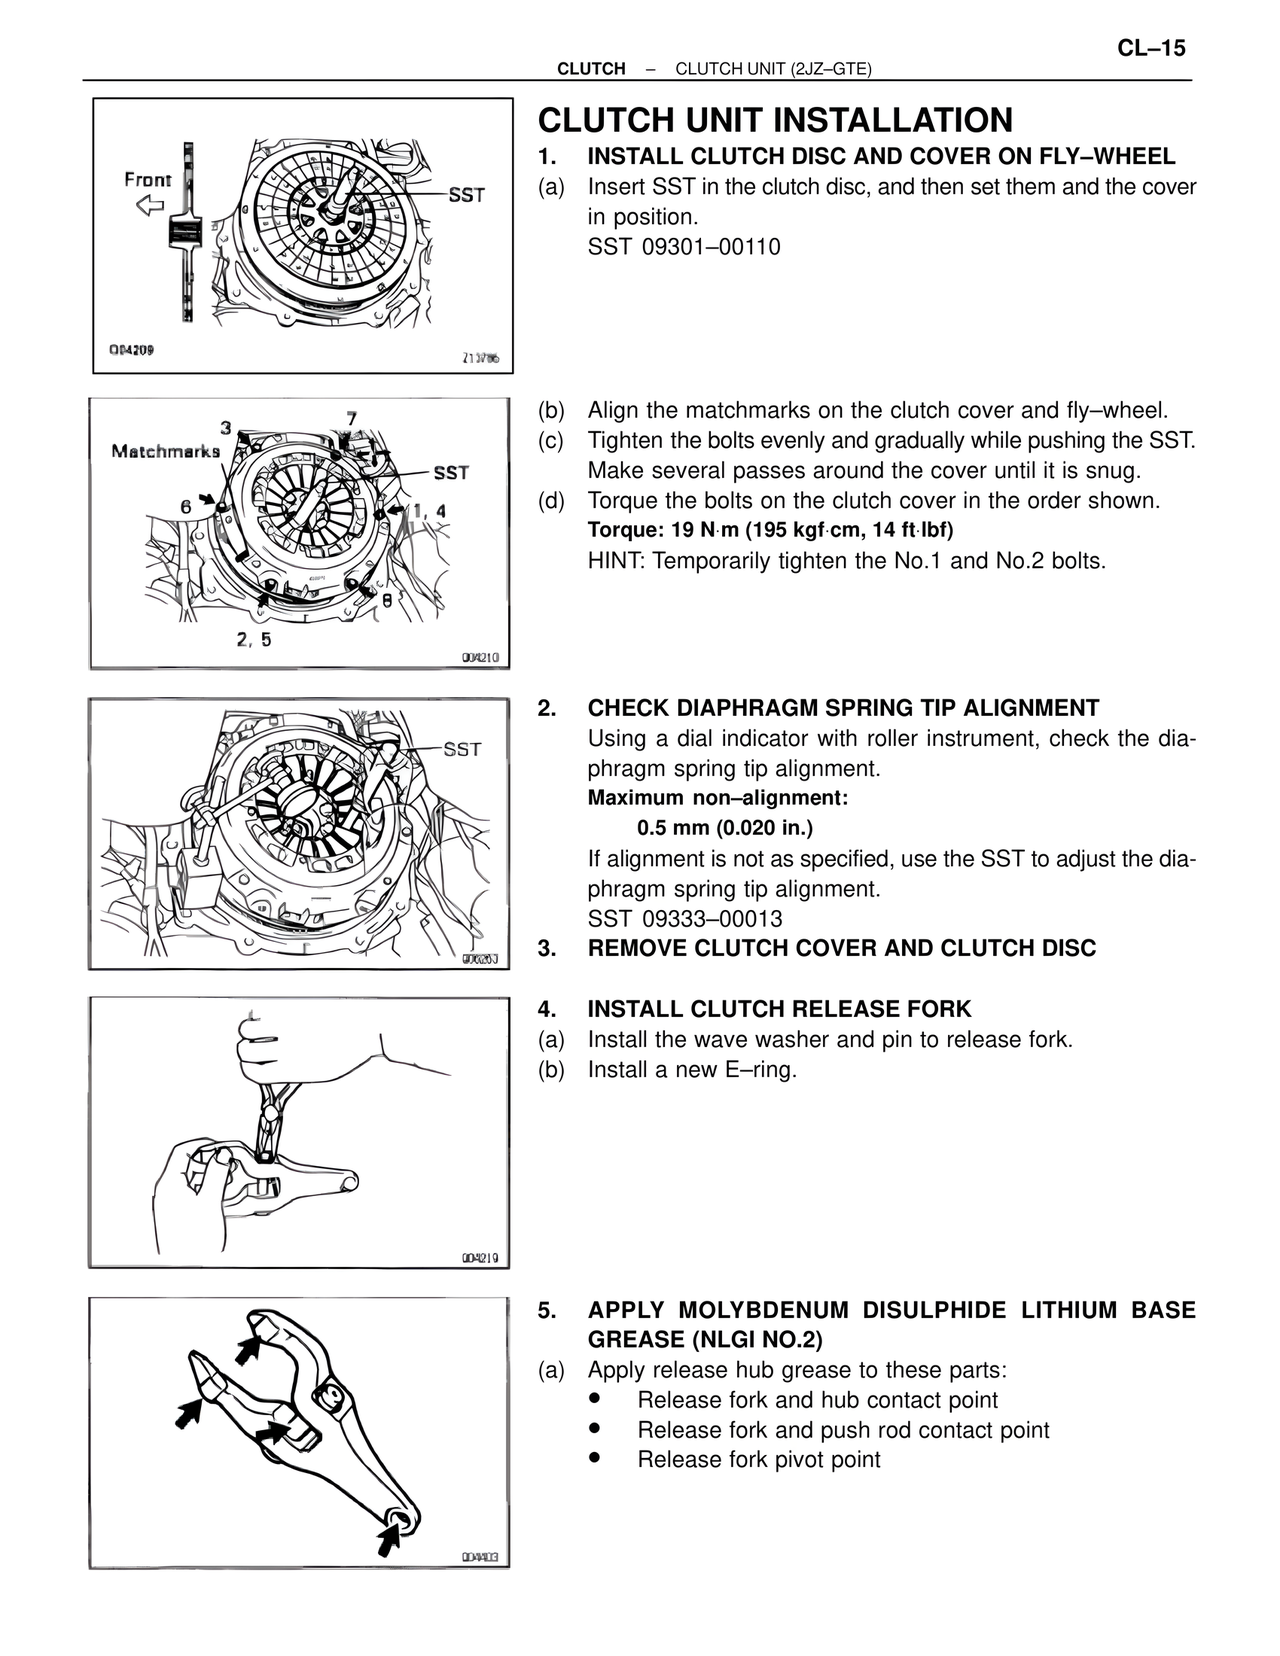
1. INSTALL CLUTCH DISC AND COVER ON FLY–WHEEL
(a) Insert SST in the clutch disc, and then set them and the cover in position.
SST 09301–00110
Front
SST
Q04209
213786
(b) Align the matchmarks on the clutch cover and fly–wheel.
(c) Tighten the bolts evenly and gradually while pushing the SST. Make several passes around the cover until it is snug.
(d) Torque the bolts on the clutch cover in the order shown.
Torque: 19 N·m (195 kgf·cm, 14 ft·lbf)
HINT: Temporarily tighten the No.1 and No.2 bolts.
Matchmarks
3
7
SST
6
1, 4
8
2, 5
004210
2. CHECK DIAPHRAGM SPRING TIP ALIGNMENT
Using a dial indicator with roller instrument, check the diaphragm spring tip alignment.
Maximum non–alignment:
0.5 mm (0.020 in.)
If alignment is not as specified, use the SST to adjust the diaphragm spring tip alignment.
SST 09333–00013
SST
006253
3. REMOVE CLUTCH COVER AND CLUTCH DISC
4. INSTALL CLUTCH RELEASE FORK
(a) Install the wave washer and pin to release fork.
(b) Install a new E–ring.
004219
5. APPLY MOLYBDENUM DISULPHIDE LITHIUM BASE GREASE (NLGI NO.2)
(a) Apply release hub grease to these parts:
• Release fork and hub contact point
• Release fork and push rod contact point
• Release fork pivot point
004409