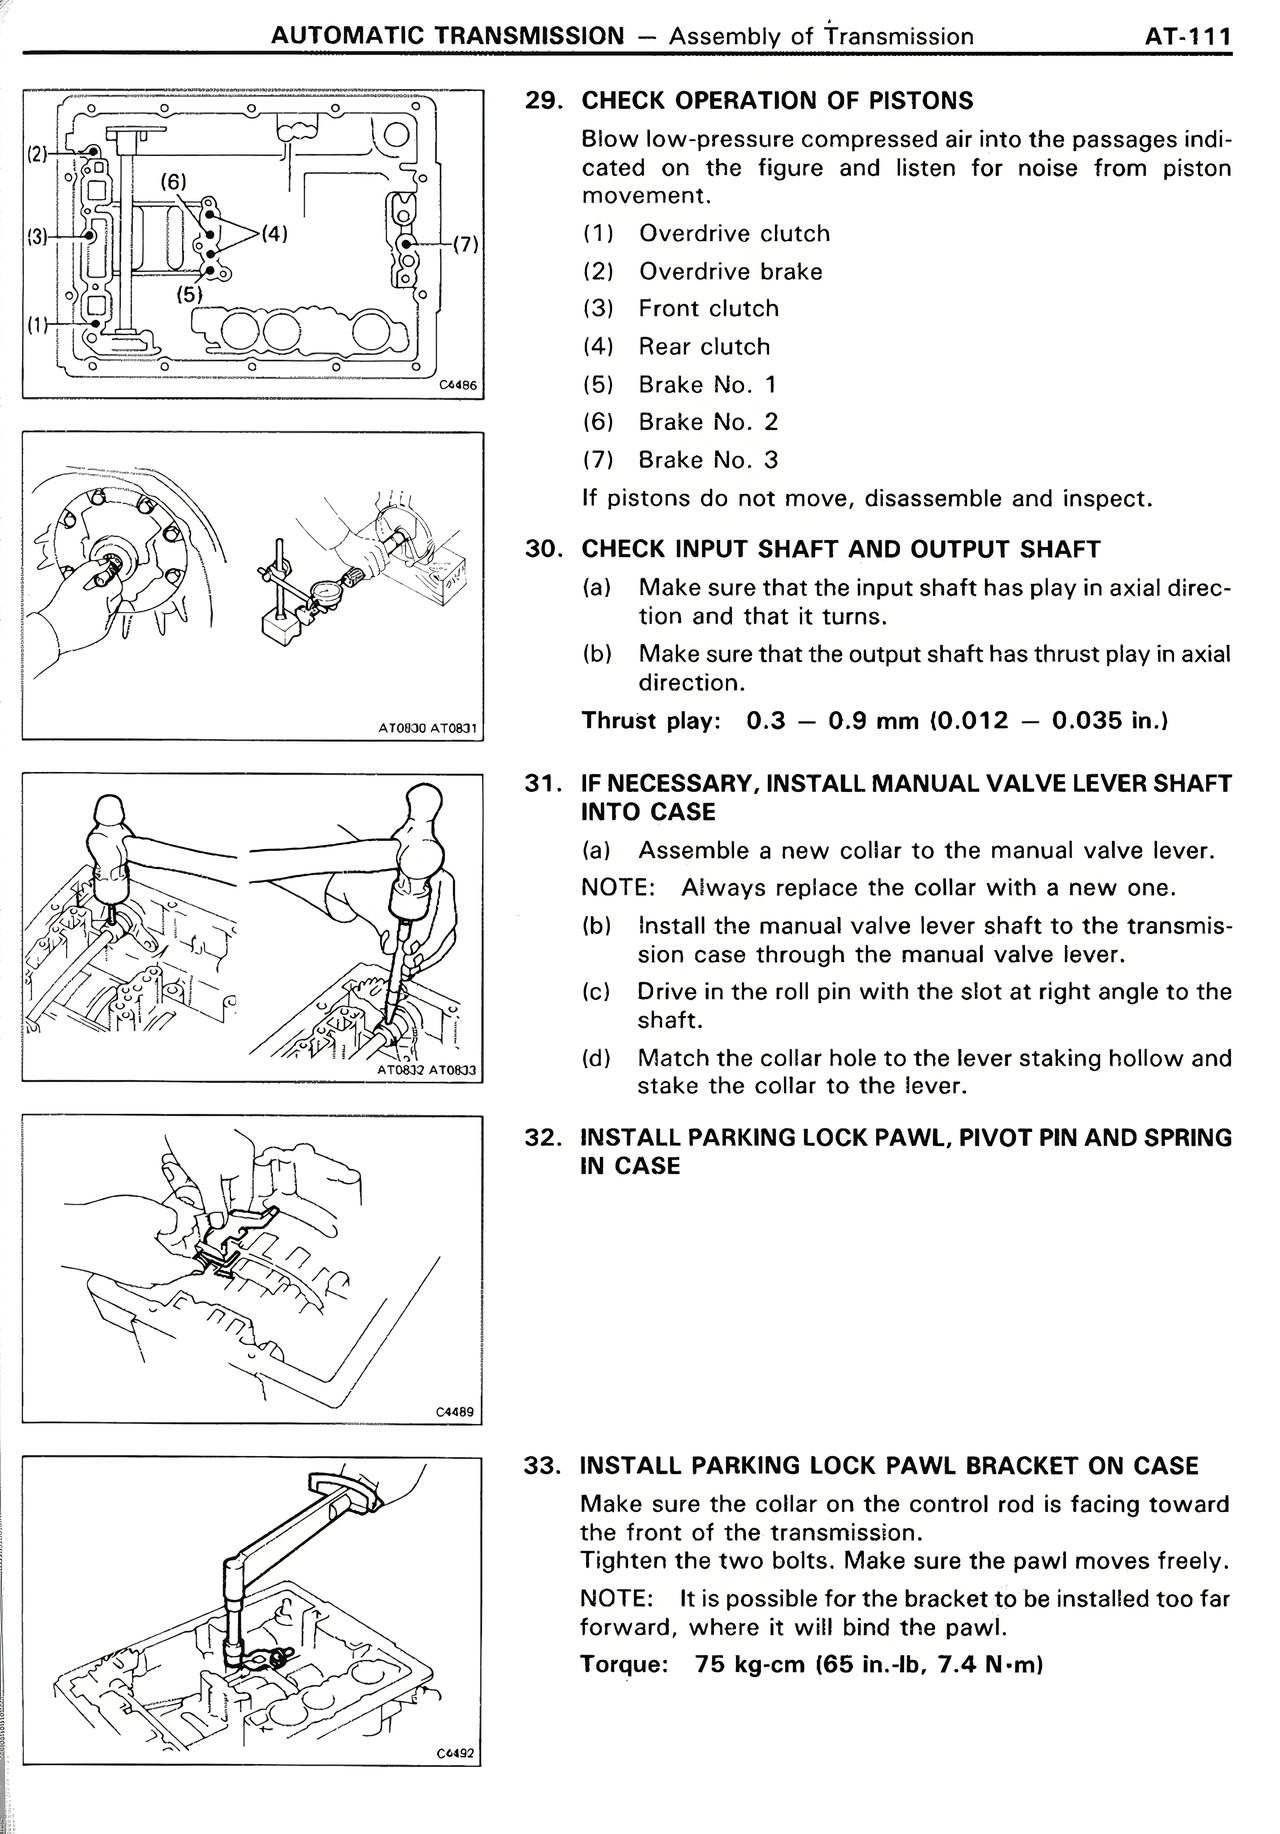
29. CHECK OPERATION OF PISTONS
Blow low-pressure compressed air into the passages indicated on the figure and listen for noise from piston movement.
(1) Overdrive clutch
(2) Overdrive brake
(3) Front clutch
(4) Rear clutch
(5) Brake No. 1
(6) Brake No. 2
(7) Brake No. 3
If pistons do not move, disassemble and inspect.
30. CHECK INPUT SHAFT AND OUTPUT SHAFT
(a) Make sure that the input shaft has play in axial direction and that it turns.
(b) Make sure that the output shaft has thrust play in axial direction.
Thrust play: 0.3 - 0.9 mm (0.012 - 0.035 in.)
31. IF NECESSARY, INSTALL MANUAL VALVE LEVER SHAFT INTO CASE
(a) Assemble a new collar to the manual valve lever.
NOTE: Always replace the collar with a new one.
(b) Install the manual valve lever shaft to the transmission case through the manual valve lever.
(c) Drive in the roll pin with the slot at right angle to the shaft.
(d) Match the collar to the lever staking hollow and stake the collar to the lever.
32. INSTALL PARKING LOCK PAWL, PIVOT PIN AND SPRING IN CASE
33. INSTALL PARKING LOCK PAWL BRACKET ON CASE
Make sure the collar on the control rod is facing toward the front of the transmission.
Tighten the two bolts. Make sure the pawl moves freely.
NOTE: It is possible for the bracket to be installed too far forward, where it will bind the pawl.
Torque: 75 kg-cm (65 in.-lb, 7.4 N-m)