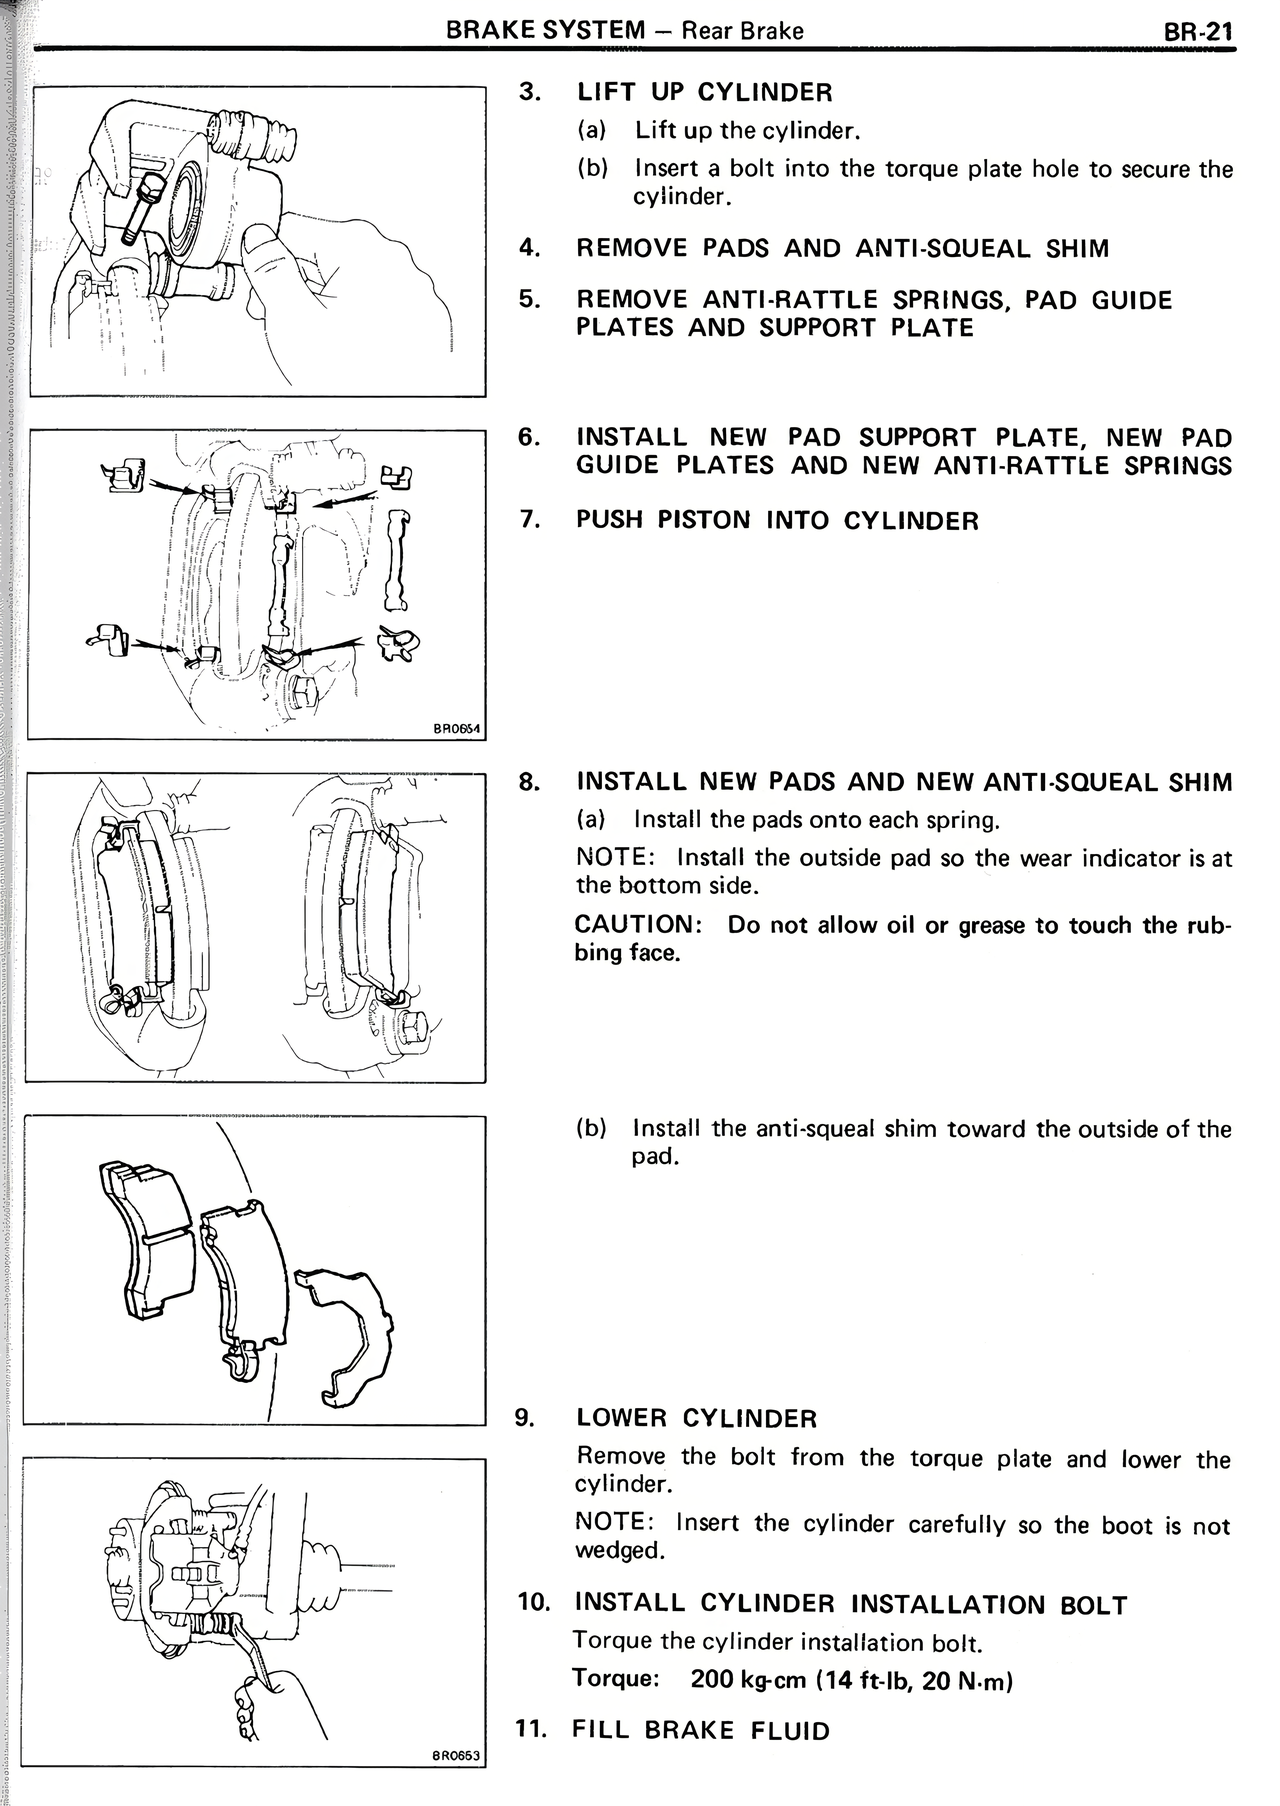
3. LIFT UP CYLINDER
(a) Lift up the cylinder.
(b) Insert a bolt into the torque plate hole to secure the cylinder.
4. REMOVE PADS AND ANTI-SQUEAL SHIM
5. REMOVE ANTI-RATTLE SPRINGS, PAD GUIDE PLATES AND SUPPORT PLATE
6. INSTALL NEW PAD SUPPORT PLATE, NEW PAD GUIDE PLATES AND NEW ANTI-RATTLE SPRINGS
7. PUSH PISTON INTO CYLINDER
8. INSTALL NEW PADS AND NEW ANTI-SQUEAL SHIM
(a) Install the pads onto each spring.
NOTE: Install the outside pad so the wear indicator is at the bottom side.
CAUTION: Do not allow oil or grease to touch the rubbing face.
(b) Install the anti-squeal shim toward the outside of the pad.
9. LOWER CYLINDER
Remove the bolt from the torque plate and lower the cylinder.
NOTE: Insert the cylinder carefully so the boot is not wedged.
10. INSTALL CYLINDER INSTALLATION BOLT
Torque the cylinder installation bolt.
Torque: 200 kg-cm (14 ft-lb, 20 N-m)
11. FILL BRAKE FLUID