INSPECTION OF CYLINDER BLOCK
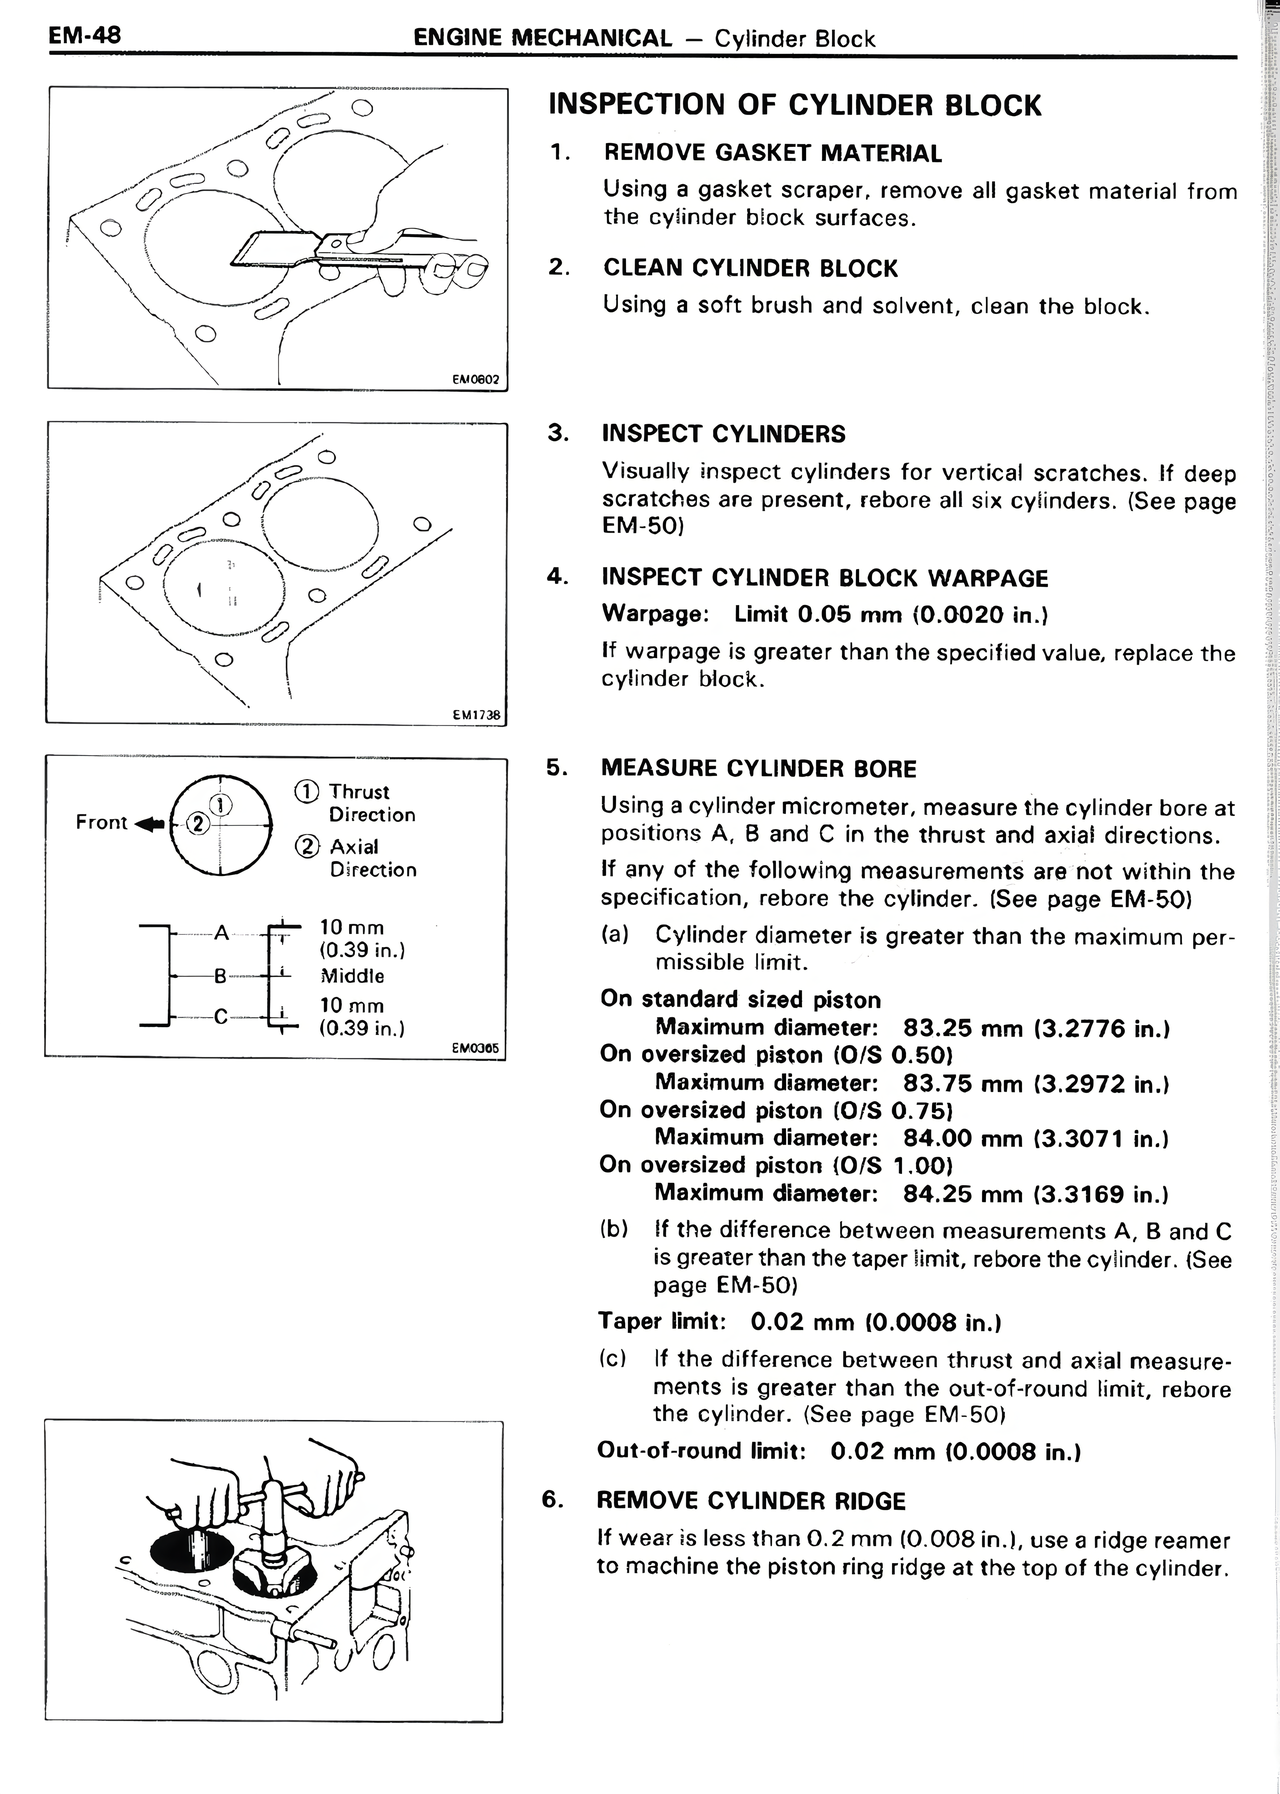
1. REMOVE GASKET MATERIAL
Using a gasket scraper, remove all gasket material from the cylinder block surfaces.
2. CLEAN CYLINDER BLOCK
Using a soft brush and solvent, clean the block.
3. INSPECT CYLINDERS
Visually inspect cylinders for vertical scratches. If deep scratches are present, rebore all six cylinders. (See page EM-50)
4. INSPECT CYLINDER BLOCK WARPAGE
Warpage: Limit 0.05 mm (0.0020 in.)
If warpage is greater than the specified value, replace the cylinder block.
5. MEASURE CYLINDER BORE
Using a cylinder micrometer, measure the cylinder bore at positions A, B and C in the thrust and axial directions.
If any of the following measurements are not within the specification, rebore the cylinder. (See page EM-50)
(a) Cylinder diameter is greater than the maximum permissible limit.
On standard sized piston
Maximum diameter: 83.25 mm (3.2776 in.)
On oversized piston (O/S 0.50)
Maximum diameter: 83.75 mm (3.2972 in.)
On oversized piston (O/S 0.75)
Maximum diameter: 84.00 mm (3.3071 in.)
On oversized piston (O/S 1.00)
Maximum diameter: 84.25 mm (3.3169 in.)
(b) If the difference between measurements A, B and C is greater than the taper limit, rebore the cylinder. (See page EM-50)
Taper limit: 0.02 mm (0.0008 in.)
(c) If the difference between thrust and axial measurements is greater than the out-of-round limit, rebore the cylinder. (See page EM-50)
Out-of-round limit: 0.02 mm (0.0008 in.)
6. REMOVE CYLINDER RIDGE
If wear is less than 0.2 mm (0.008 in.), use a ridge reamer to machine the piston ring ridge at the top of the cylinder.
Front
① Thrust Direction
② Axial Direction
A 10 mm (0.39 in.)
Middle
B
C 10 mm (0.39 in.)
EM0602
EM1788
EM0498