DISASSEMBLY OF GEAR HOUSING
(See page SR-27)
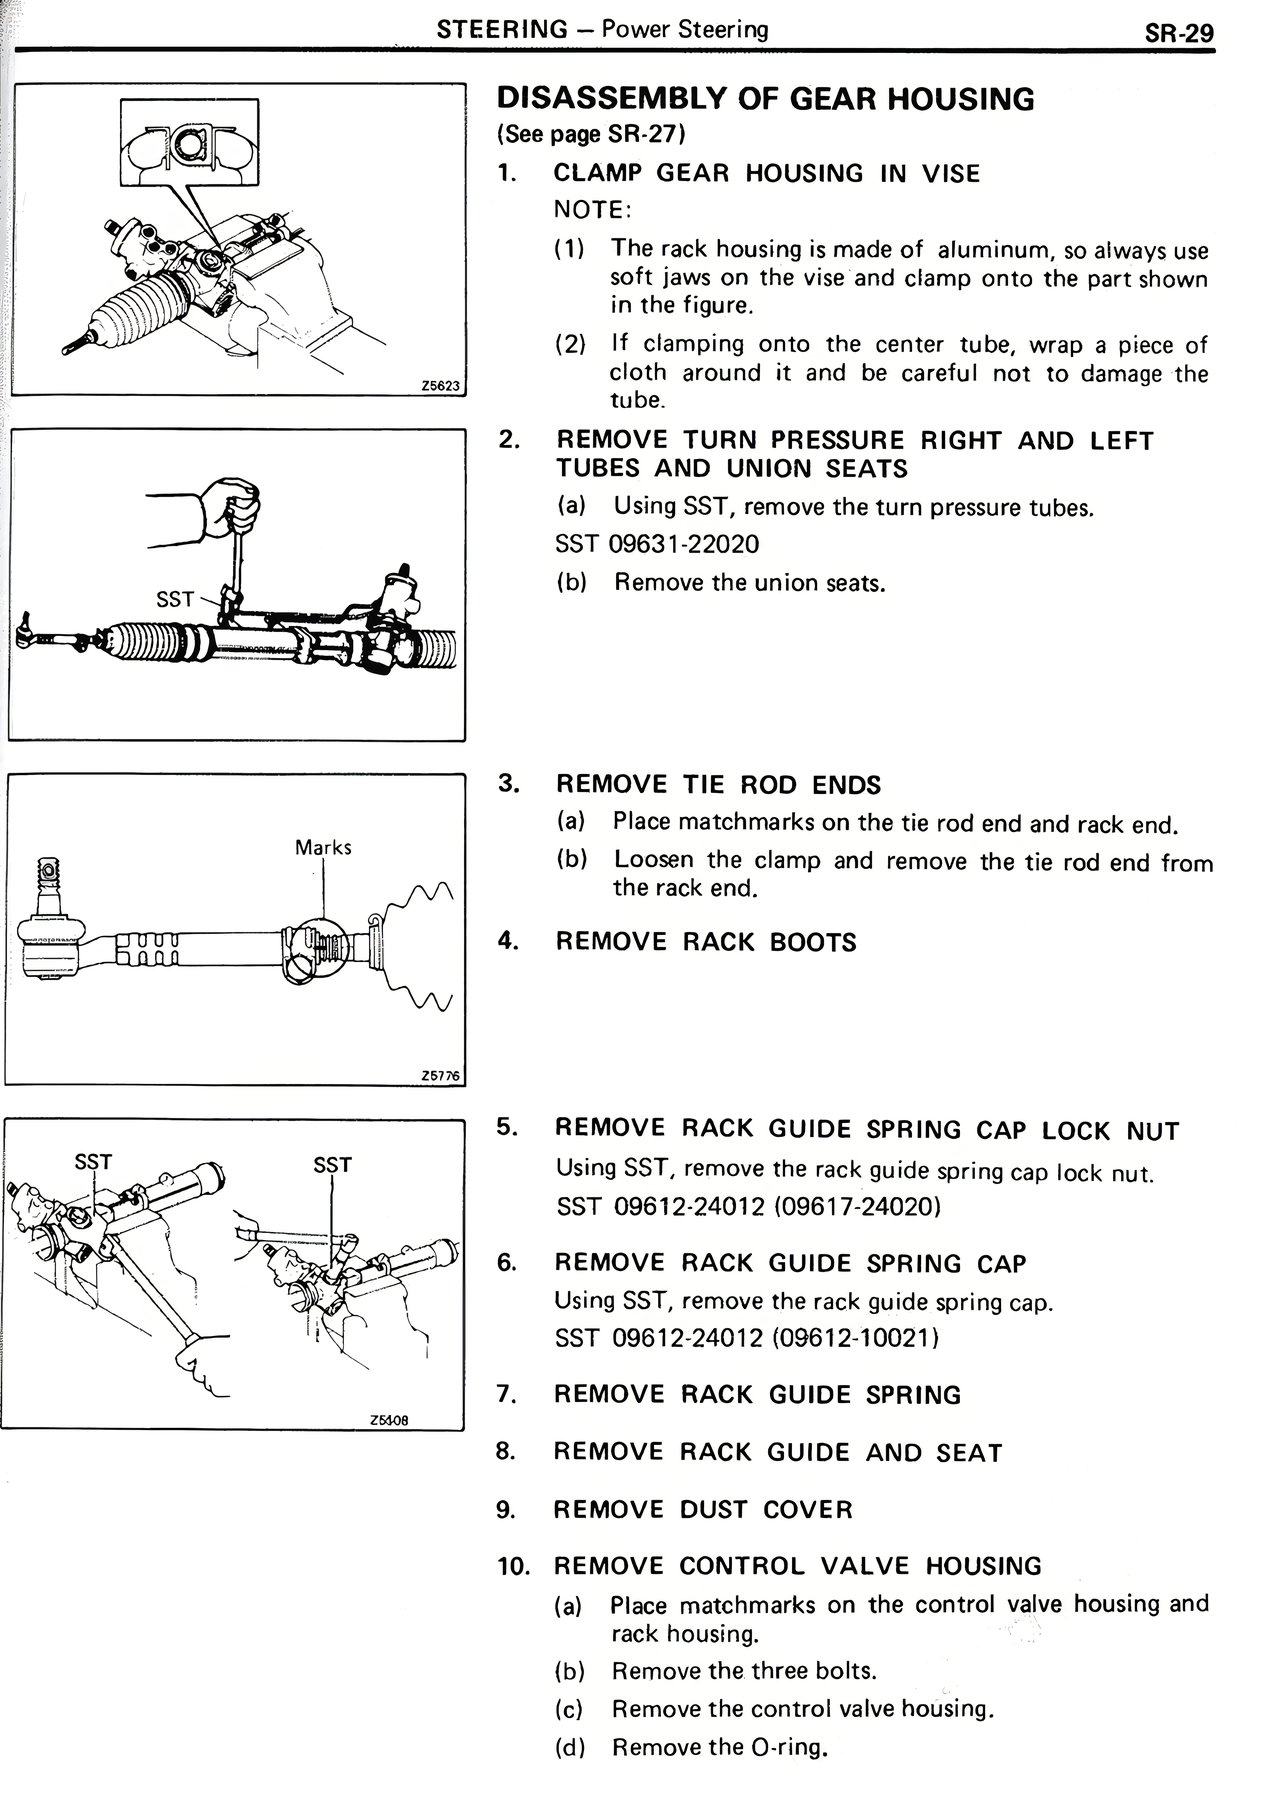
1. CLAMP GEAR HOUSING IN VISE
NOTE:
(1) The rack housing is made of aluminum, so always use soft jaws on the vise and clamp onto the part shown in the figure.
(2) If clamping onto the center tube, wrap a piece of cloth around it and be careful not to damage the tube.
2. REMOVE TURN PRESSURE RIGHT AND LEFT TUBES AND UNION SEATS
(a) Using SST, remove the turn pressure tubes.
SST 09633-22020
(b) Remove the union seats.
3. REMOVE TIE ROD ENDS
(a) Place matchmarks on the tie rod end and rack end.
(b) Loosen the clamp and remove the tie rod end from the rack end.
4. REMOVE RACK BOOTS
5. REMOVE RACK GUIDE SPRING CAP LOCK NUT
Using SST, remove the rack guide spring cap lock nut.
SST 09612-24012 (09617-24020)
6. REMOVE RACK GUIDE SPRING CAP
Using SST, remove the rack guide spring cap.
SST 09612-24012 (09612-10021)
7. REMOVE RACK GUIDE SPRING
8. REMOVE RACK GUIDE AND SEAT
9. REMOVE DUST COVER
10. REMOVE CONTROL VALVE HOUSING
(a) Place matchmarks on the control valve housing and rack housing.
(b) Remove the three bolts.
(c) Remove the control valve housing.
(d) Remove the O-ring.