100%
C
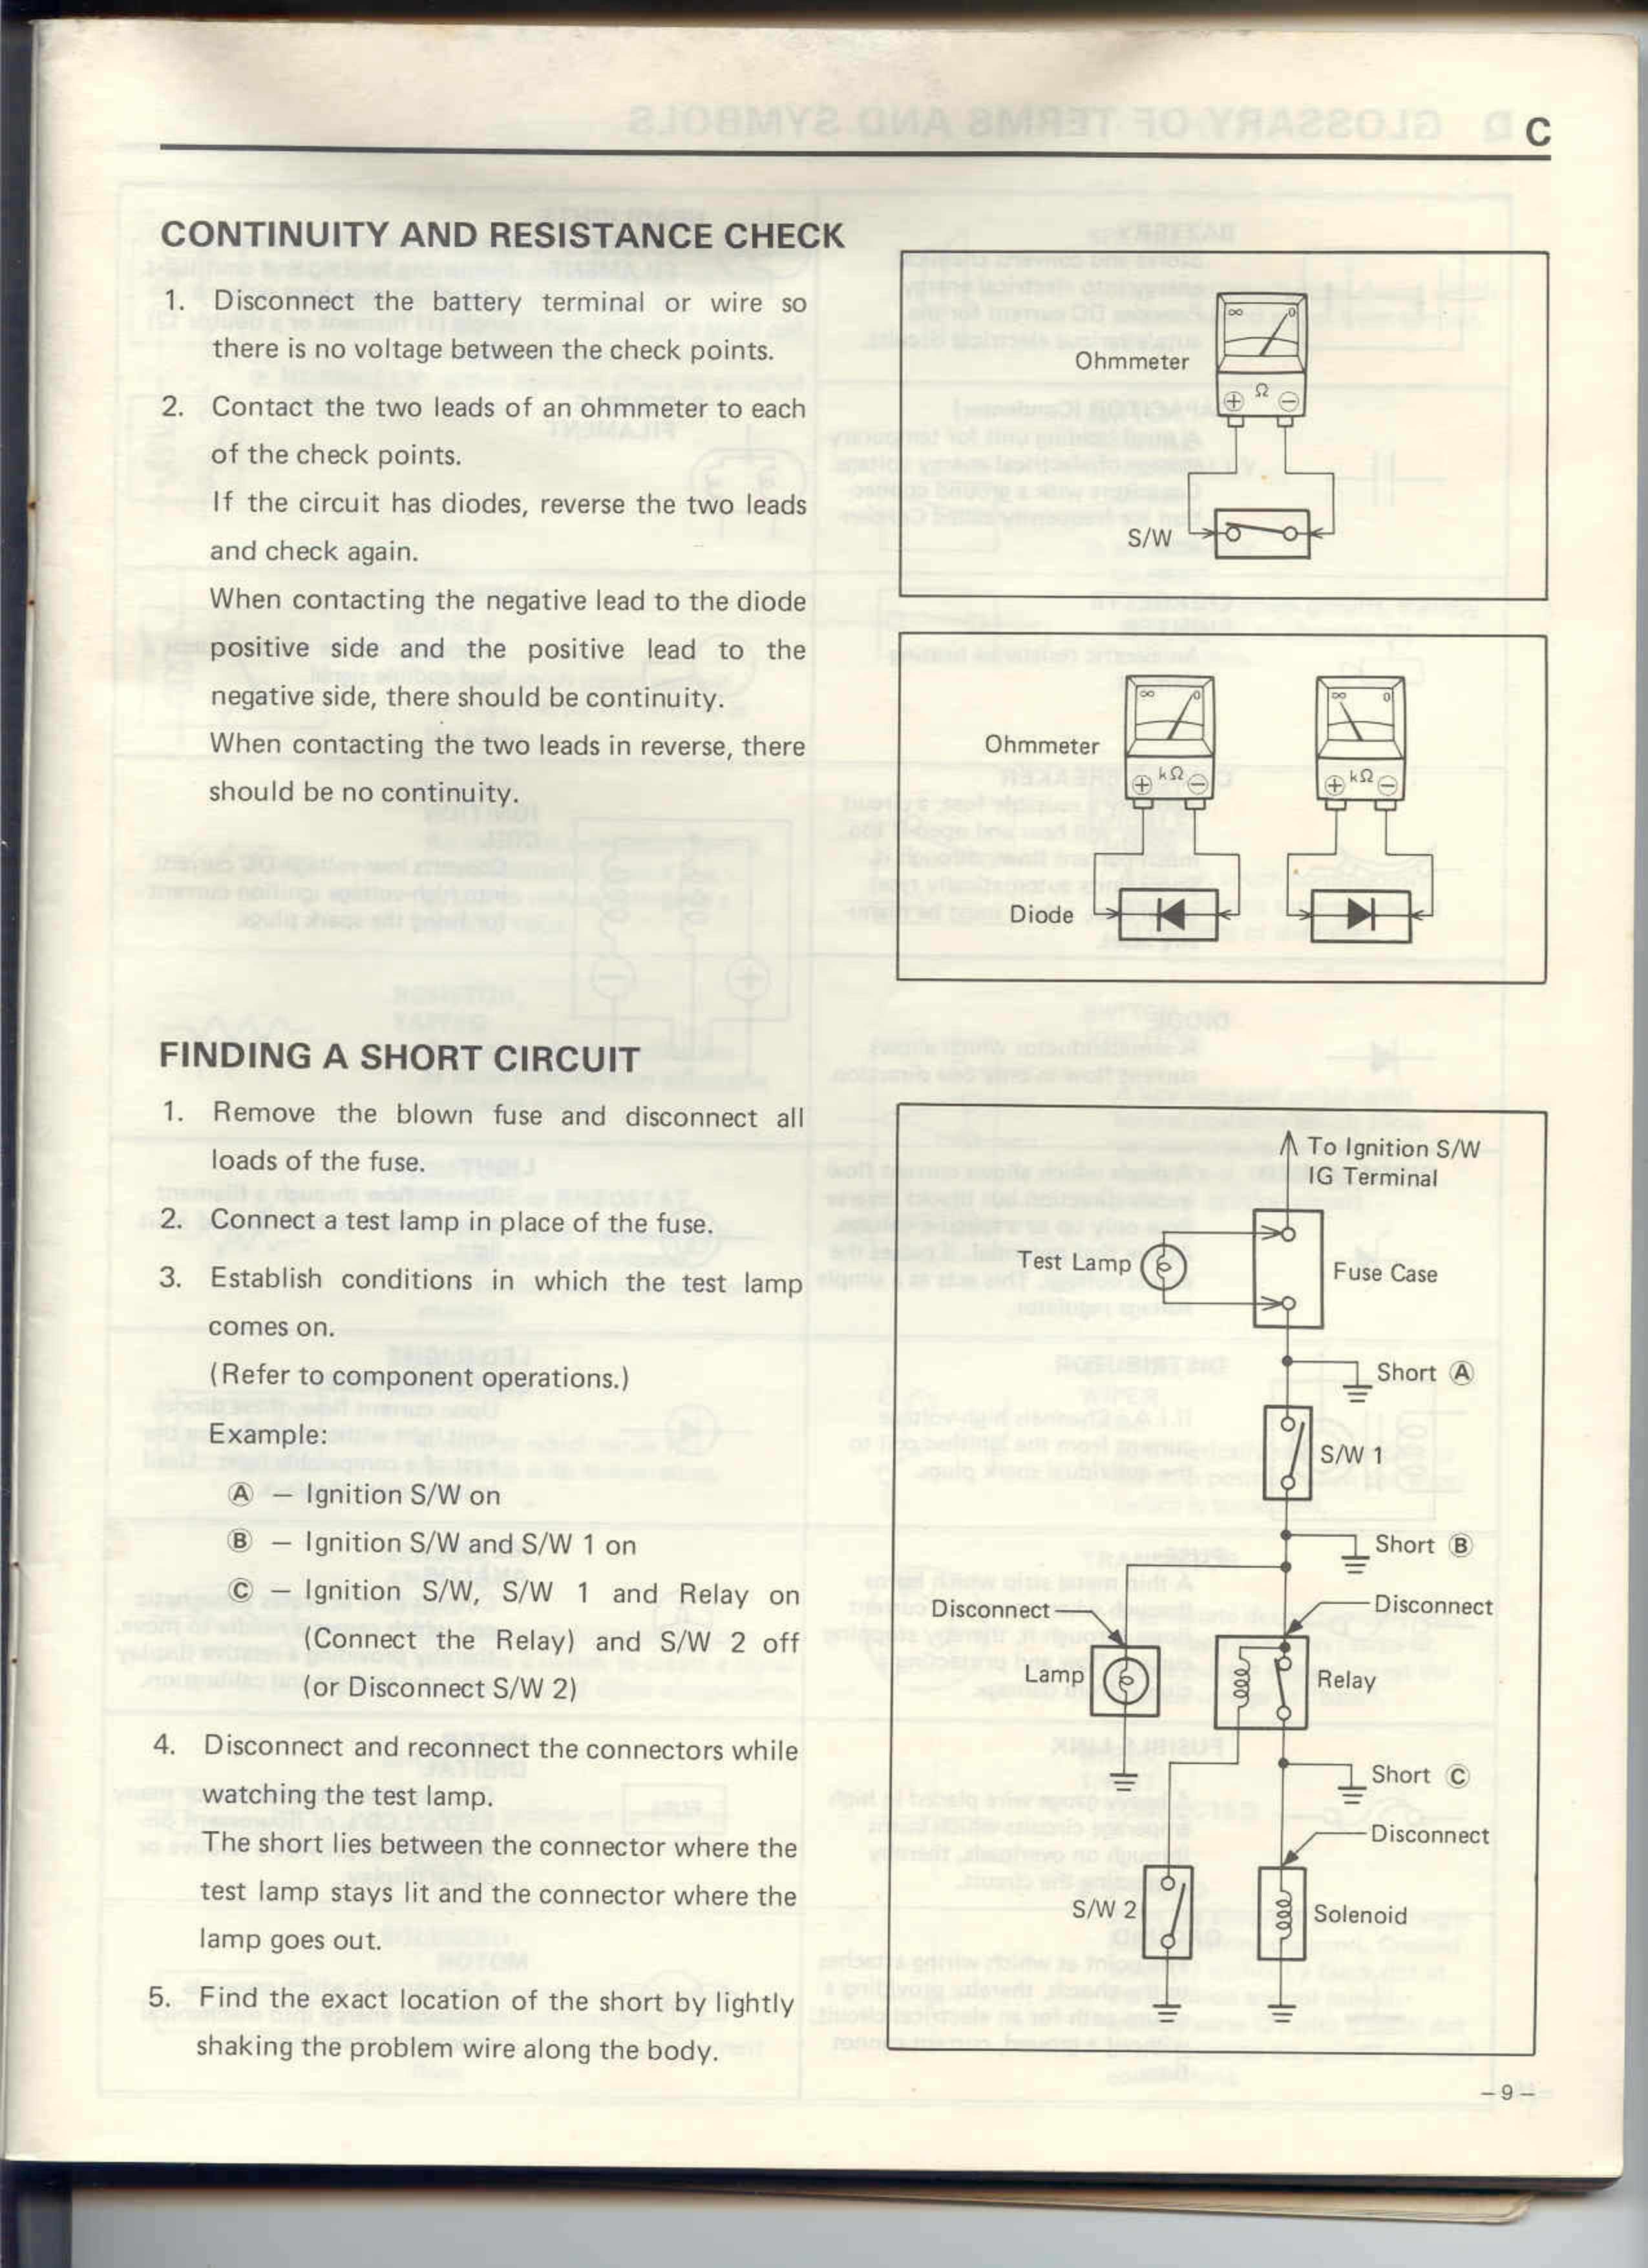
CONTINUITY AND RESISTANCE CHECK
1. Disconnect the battery terminal or wire so there is no voltage between the check points.
2. Contact the two leads of an ohmmeter to each of the check points.
If the circuit has diodes, reverse the two leads and check again.
When contacting the negative lead to the diode positive side and the positive lead to the negative side, there should be continuity.
When contacting the two leads in reverse, there should be no continuity.
[DIAGRAM: Shows ohmmeter connected to S/W switch]
[DIAGRAM: Shows two ohmmeters connected to diodes in forward and reverse configuration]
FINDING A SHORT CIRCUIT
1. Remove the blown fuse and disconnect all loads of the fuse.
2. Connect a test lamp in place of the fuse.
3. Establish conditions in which the test lamp comes on.
(Refer to component operations.)
Example:
A - Ignition S/W on
B - Ignition S/W and S/W 1 on
C - Ignition S/W, S/W 1 and Relay on (Connect the Relay) and S/W 2 off (or Disconnect S/W 2)
4. Disconnect and reconnect the connectors while watching the test lamp.
The short lies between the connector where the test lamp stays lit and the connector where the lamp goes out.
5. Find the exact location of the short by lightly shaking the problem wire along the body.
[DIAGRAM: Shows electrical circuit with Test Lamp, Fuse Case, S/W 1, Lamp, Relay, S/W 2, Solenoid, and ground points marked as Short A, Short B, and Short C. Labels indicate "To Ignition S/W IG Terminal" and "Disconnect" points]
-9-