← p.031p.033 →
AT/Automatic Transmission — On-Vehicle Repair Removal of Solenoid or Valve Body, page 32
32 / 120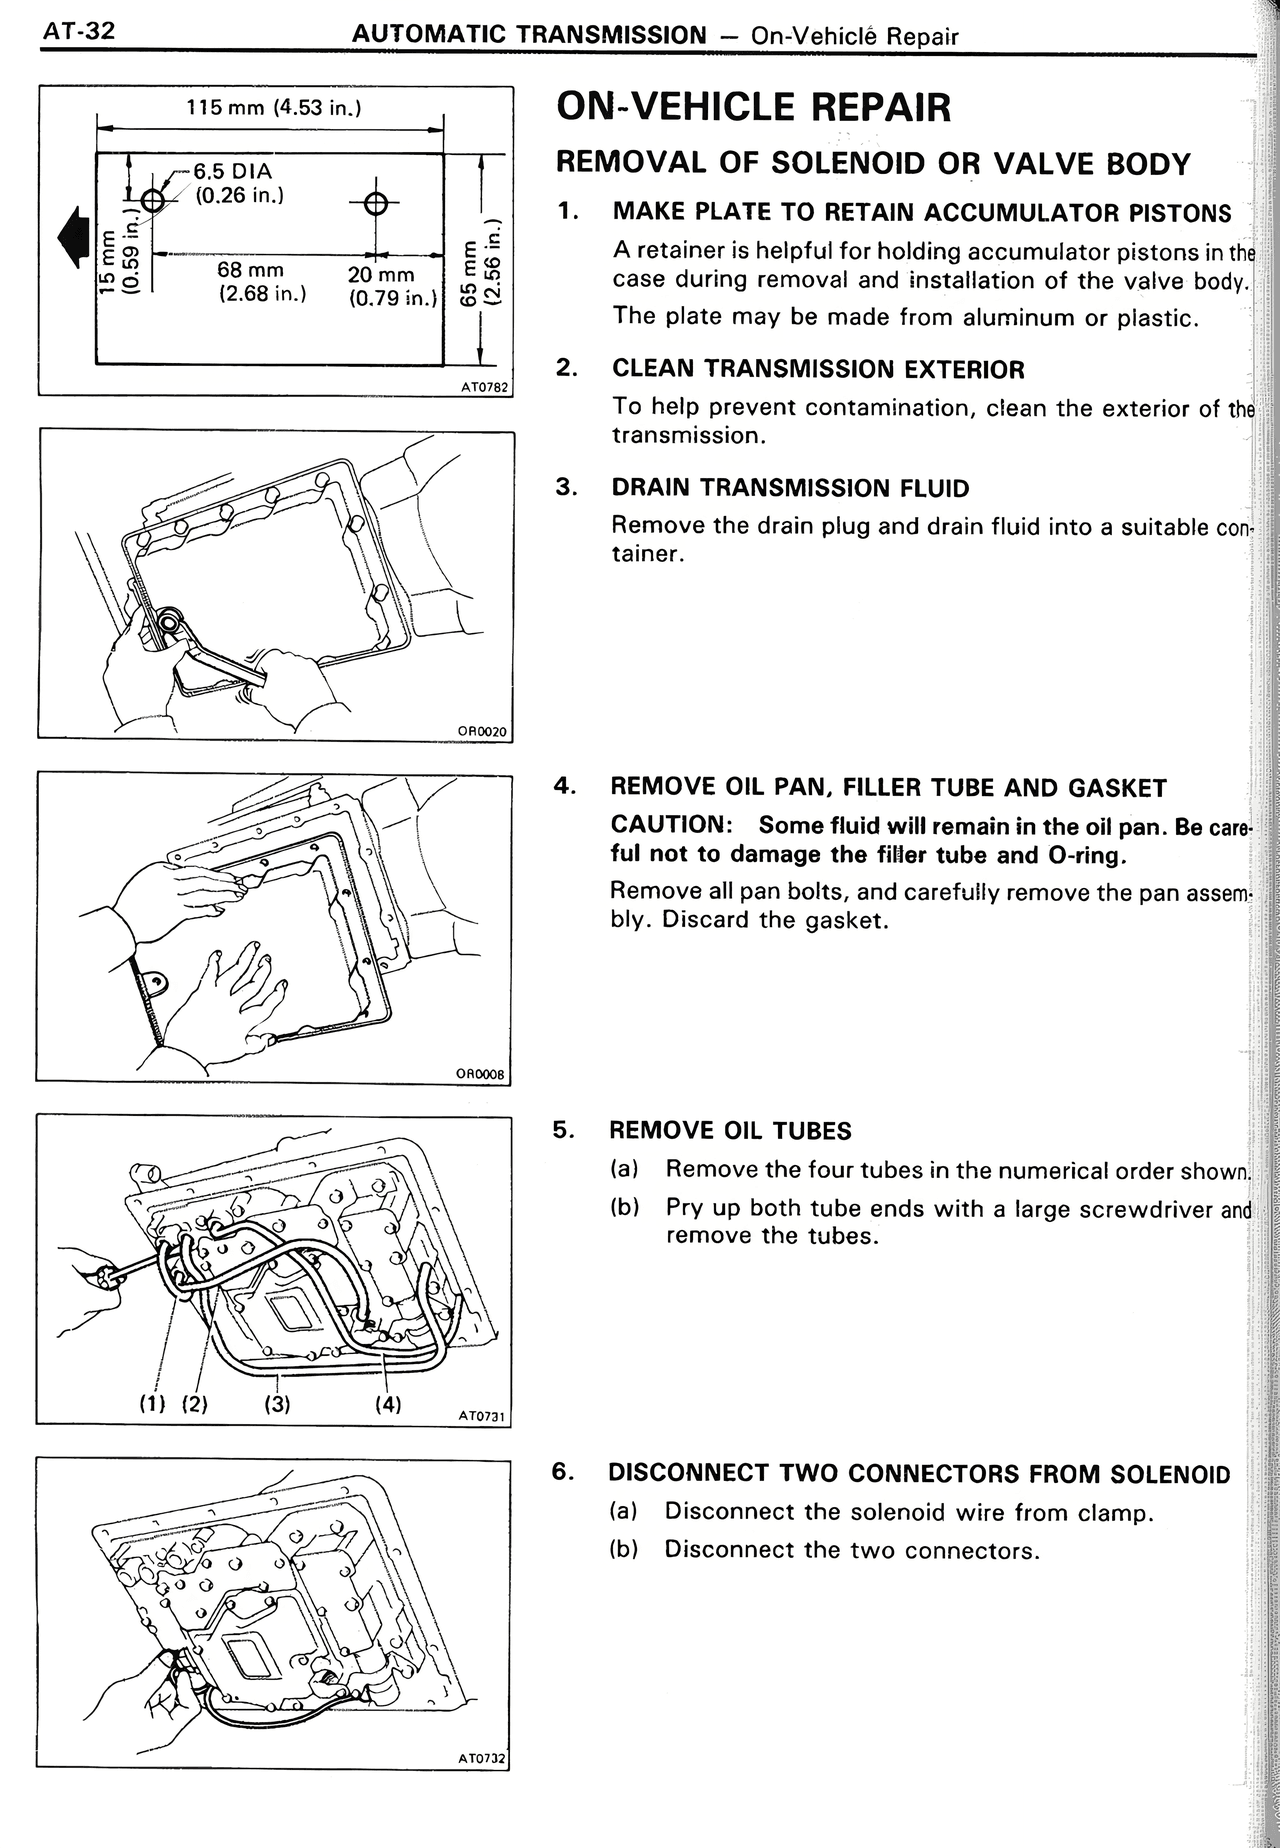
100%
Page text (OCR transcript)
AT-32                    AUTOMATIC TRANSMISSION — On-Vehicle Repair

115 mm (4.53 in.)

6.5 DIA
(0.26 in.)

8.5 mm
(0.33 in.)

68 mm
(2.68 in.)

20 mm
(0.79 in.)

6.5 mm
(0.26 in.)

ON-VEHICLE REPAIR
REMOVAL OF SOLENOID OR VALVE BODY

1. MAKE PLATE TO RETAIN ACCUMULATOR PISTONS
A retainer is helpful for holding accumulator pistons in the case during removal and installation of the valve body. The plate may be made from aluminum or plastic.

2. CLEAN TRANSMISSION EXTERIOR
To help prevent contamination, clean the exterior of the transmission.

3. DRAIN TRANSMISSION FLUID
Remove the drain plug and drain fluid into a suitable container.

4. REMOVE OIL PAN, FILLER TUBE AND GASKET
CAUTION: Some fluid will remain in the oil pan. Be careful not to damage the filler tube and O-ring.
Remove all pan bolts, and carefully remove the pan assembly. Discard the gasket.

5. REMOVE OIL TUBES
(a) Remove the four tubes in the numerical order shown.
(b) Pry up both tube ends with a large screwdriver and remove the tubes.

(1) (2)     (3)        (4)

6. DISCONNECT TWO CONNECTORS FROM SOLENOID
(a) Disconnect the solenoid wire from clamp.
(b) Disconnect the two connectors.