INSPECTION OF REAR WINDOW DEFOGGER WIRES
1. INSPECT FOR WIRE BREAKAGE
(a) Turn the ignition switch to ON.
(b) Turn the defogger switch to ON.
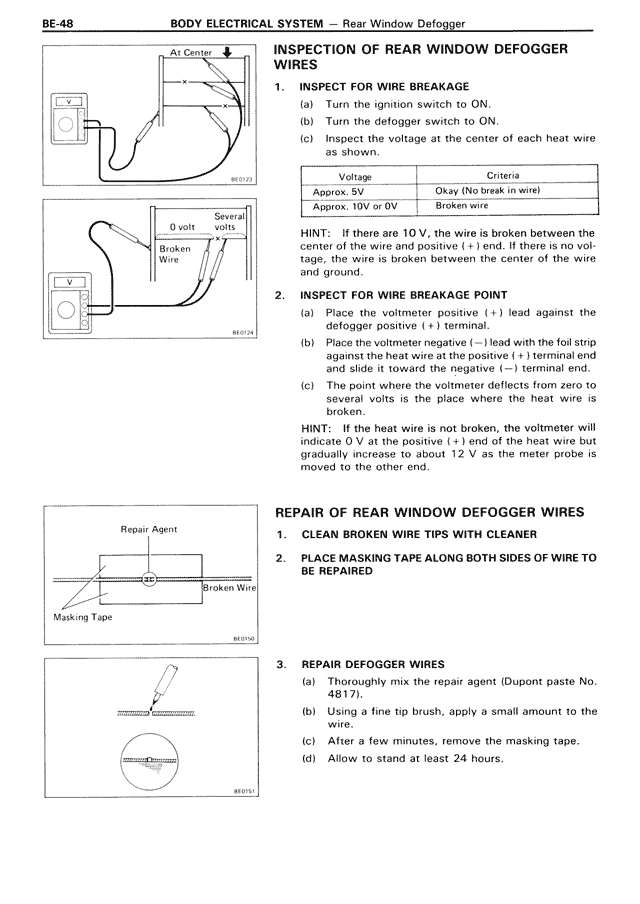
(c) Inspect the voltage at the center of each heat wire as shown.
Voltage | Criteria
Approx. 8V | Okay (No break in wire)
Approx. 10V or 0V | Broken wire
HINT: If there are 10 V, the wire is broken between the center of the wire and positive (+) end. If there is no voltage, the wire is broken between the center of the wire and ground.
2. INSPECT FOR WIRE BREAKAGE POINT
(a) Place the voltmeter positive (+) lead against the defogger positive (+) terminal.
(b) Place the voltmeter negative (—) lead with the foil strip against the heat wire at the positive (+) terminal end and slide it toward the negative (—) terminal end.
(c) The point where the voltmeter deflects from zero to several volts is the place where the heat wire is broken.
HINT: If the heat wire is not broken, the voltmeter will indicate 0 V at the positive (+) end of the heat wire but gradually increase to about 12 V as the meter probe is moved to the other end.
REPAIR OF REAR WINDOW DEFOGGER WIRES
1. CLEAN BROKEN WIRE TIPS WITH CLEANER
2. PLACE MASKING TAPE ALONG BOTH SIDES OF WIRE TO BE REPAIRED
3. REPAIR DEFOGGER WIRES
(a) Thoroughly mix the repair agent (Dupont paste No. 4817).
(b) Using a fine tip brush, apply a small amount to the wire.
(c) After a few minutes, remove the masking tape.
(d) Allow to stand at least 24 hours.