BR–6
BRAKE SYSTEM – CHECK AND ADJUSTMENT
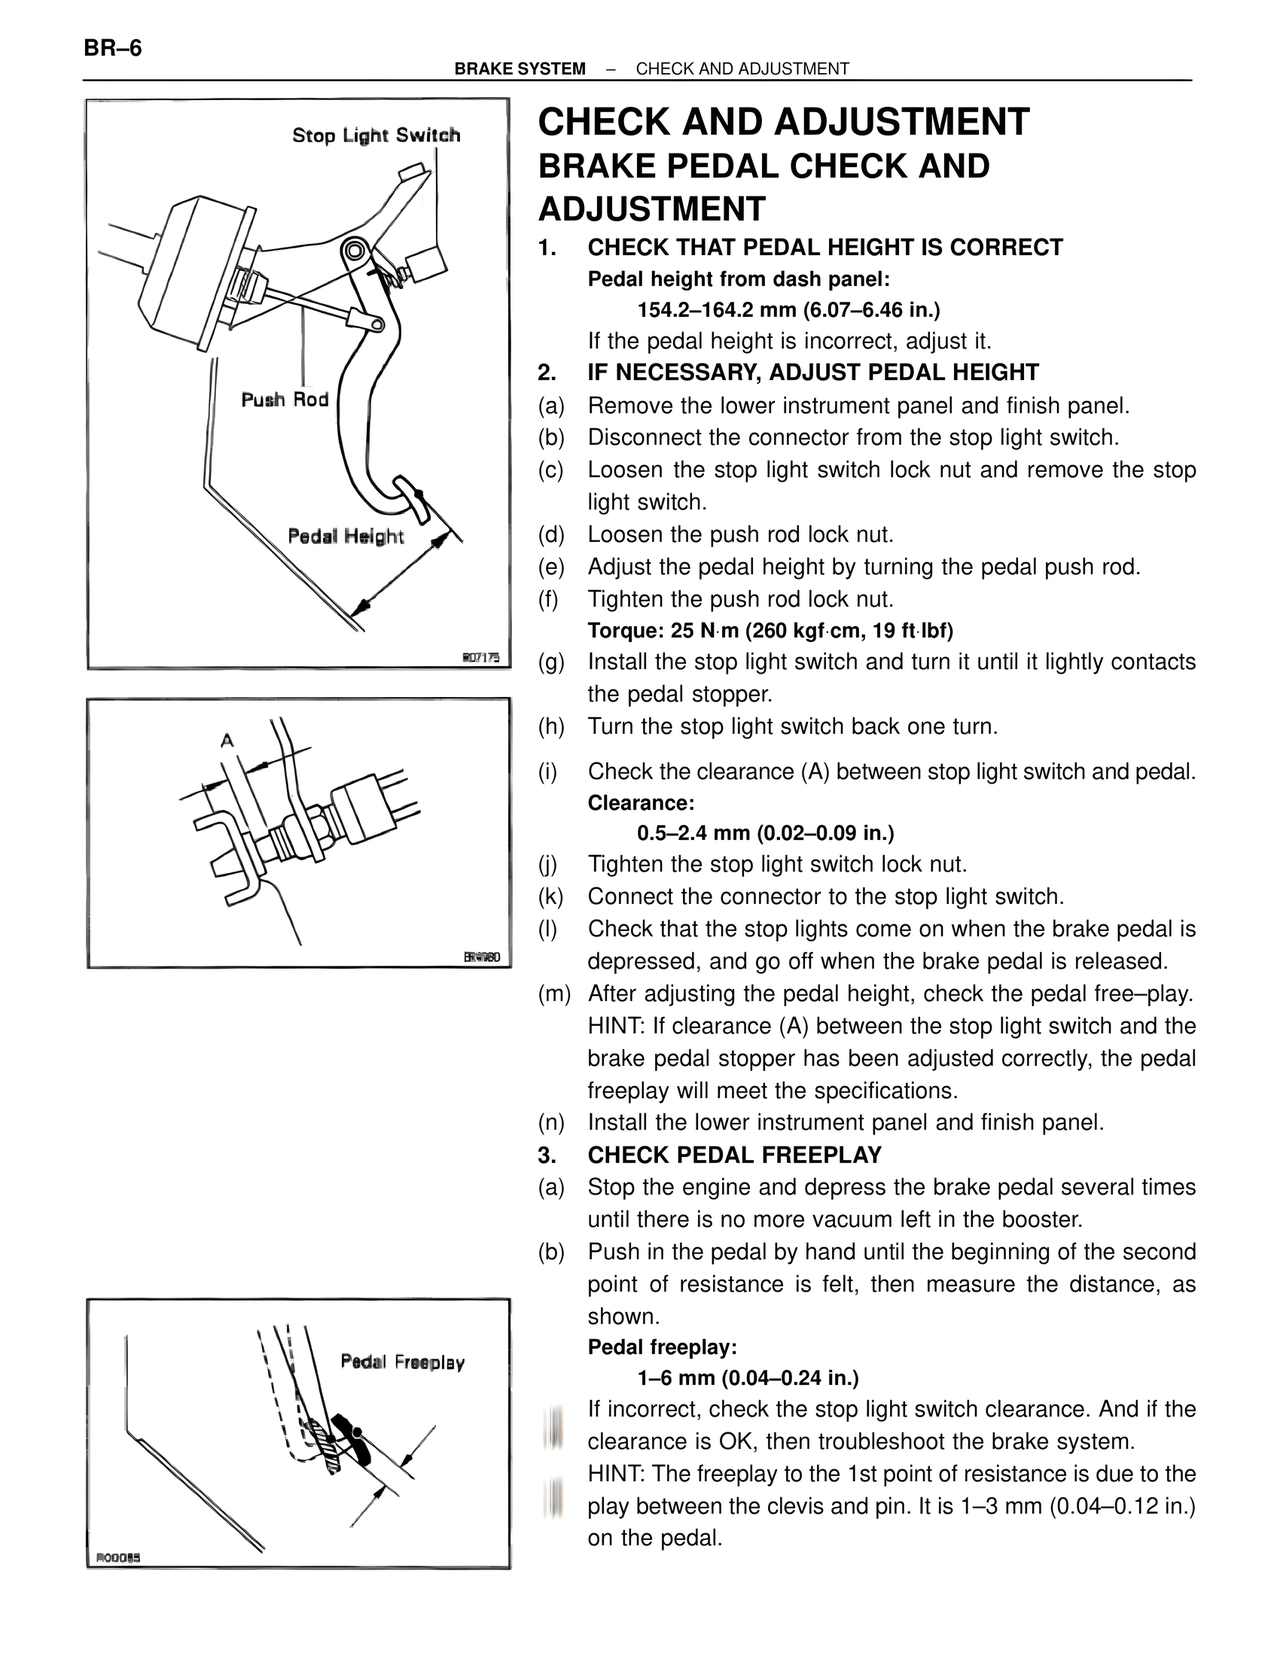
Stop Light Switch
Push Rod
Pedal Height
B07175
A
BR4980
Pedal Freeplay
RC0085
CHECK AND ADJUSTMENT
BRAKE PEDAL CHECK AND
ADJUSTMENT
1. CHECK THAT PEDAL HEIGHT IS CORRECT
Pedal height from dash panel:
154.2–164.2 mm (6.07–6.46 in.)
If the pedal height is incorrect, adjust it.
2. IF NECESSARY, ADJUST PEDAL HEIGHT
(a) Remove the lower instrument panel and finish panel.
(b) Disconnect the connector from the stop light switch.
(c) Loosen the stop light switch lock nut and remove the stop light switch.
(d) Loosen the push rod lock nut.
(e) Adjust the pedal height by turning the pedal push rod.
(f) Tighten the push rod lock nut.
Torque: 25 N·m (260 kgf·cm, 19 ft·lbf)
(g) Install the stop light switch and turn it until it lightly contacts the pedal stopper.
(h) Turn the stop light switch back one turn.
(i) Check the clearance (A) between stop light switch and pedal.
Clearance:
0.5–2.4 mm (0.02–0.09 in.)
(j) Tighten the stop light switch lock nut.
(k) Connect the connector to the stop light switch.
(l) Check that the stop lights come on when the brake pedal is depressed, and go off when the brake pedal is released.
(m) After adjusting the pedal height, check the pedal free–play.
HINT: If clearance (A) between the stop light switch and the brake pedal stopper has been adjusted correctly, the pedal freeplay will meet the specifications.
(n) Install the lower instrument panel and finish panel.
3. CHECK PEDAL FREEPLAY
(a) Stop the engine and depress the brake pedal several times until there is no more vacuum left in the booster.
(b) Push in the pedal by hand until the beginning of the second point of resistance is felt, then measure the distance, as shown.
Pedal freeplay:
1–6 mm (0.04–0.24 in.)
If incorrect, check the stop light switch clearance. And if the clearance is OK, then troubleshoot the brake system.
HINT: The freeplay to the 1st point of resistance is due to the play between the clevis and pin. It is 1–3 mm (0.04–0.12 in.) on the pedal.