CL–20
CLUTCH – CLUTCH UNIT (2JZ–GE)
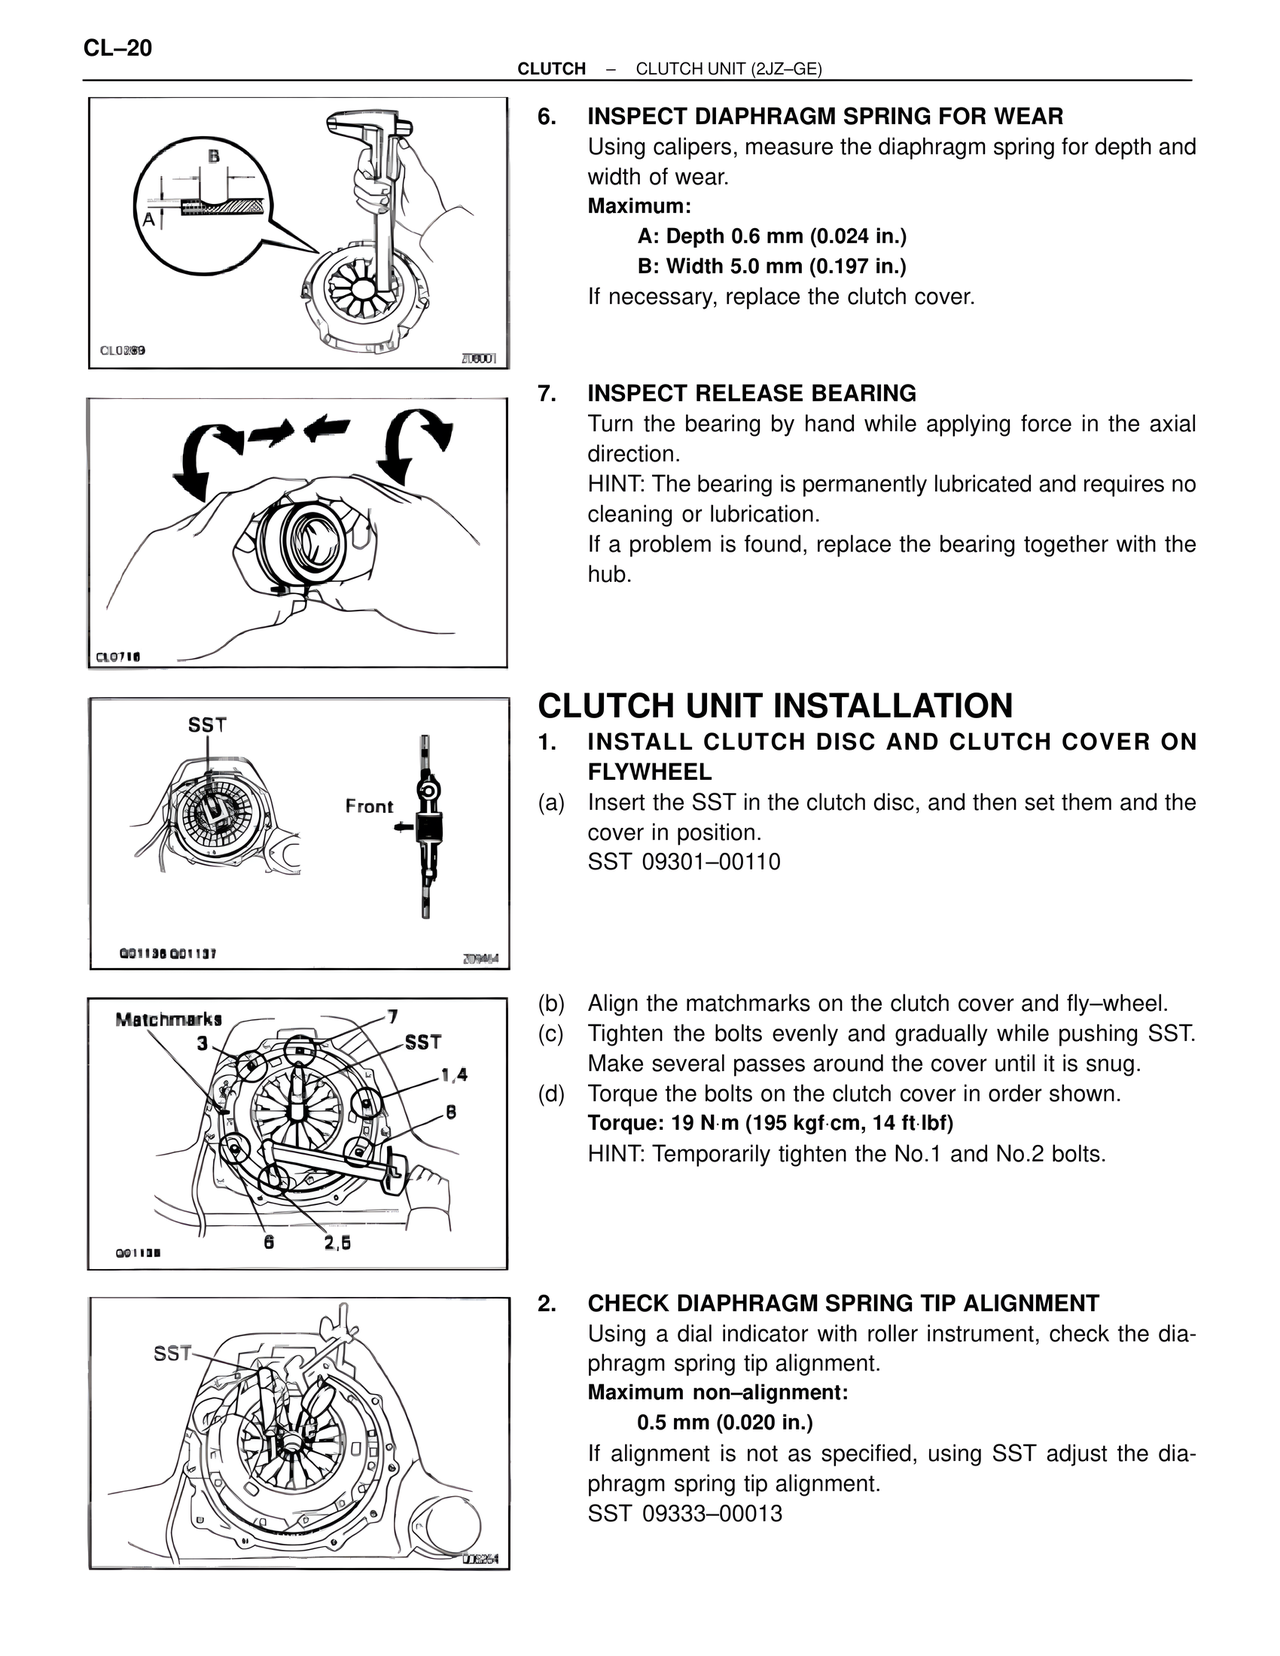
6. INSPECT DIAPHRAGM SPRING FOR WEAR
Using calipers, measure the diaphragm spring for depth and
width of wear.
Maximum:
A: Depth 0.6 mm (0.024 in.)
B: Width 5.0 mm (0.197 in.)
If necessary, replace the clutch cover.
CL0289
Z06001
7. INSPECT RELEASE BEARING
Turn the bearing by hand while applying force in the axial
direction.
HINT: The bearing is permanently lubricated and requires no
cleaning or lubrication.
If a problem is found, replace the bearing together with the
hub.
CL0716
CLUTCH UNIT INSTALLATION
1. INSTALL CLUTCH DISC AND CLUTCH COVER ON
FLYWHEEL
(a) Insert the SST in the clutch disc, and then set them and the
cover in position.
SST 09301–00110
SST
Front
Q01136 Q01137
Z09464
(b) Align the matchmarks on the clutch cover and fly–wheel.
(c) Tighten the bolts evenly and gradually while pushing SST.
Make several passes around the cover until it is snug.
(d) Torque the bolts on the clutch cover in order shown.
Torque: 19 N·m (195 kgf·cm, 14 ft·lbf)
HINT: Temporarily tighten the No.1 and No.2 bolts.
Matchmarks
3
7
SST
1,4
8
6 2,5
Q01138
2. CHECK DIAPHRAGM SPRING TIP ALIGNMENT
Using a dial indicator with roller instrument, check the dia-
phragm spring tip alignment.
Maximum non–alignment:
0.5 mm (0.020 in.)
If alignment is not as specified, using SST adjust the dia-
phragm spring tip alignment.
SST 09333–00013
SST
Q06264