EG–100
ENGINE – ENGINE MECHANICAL
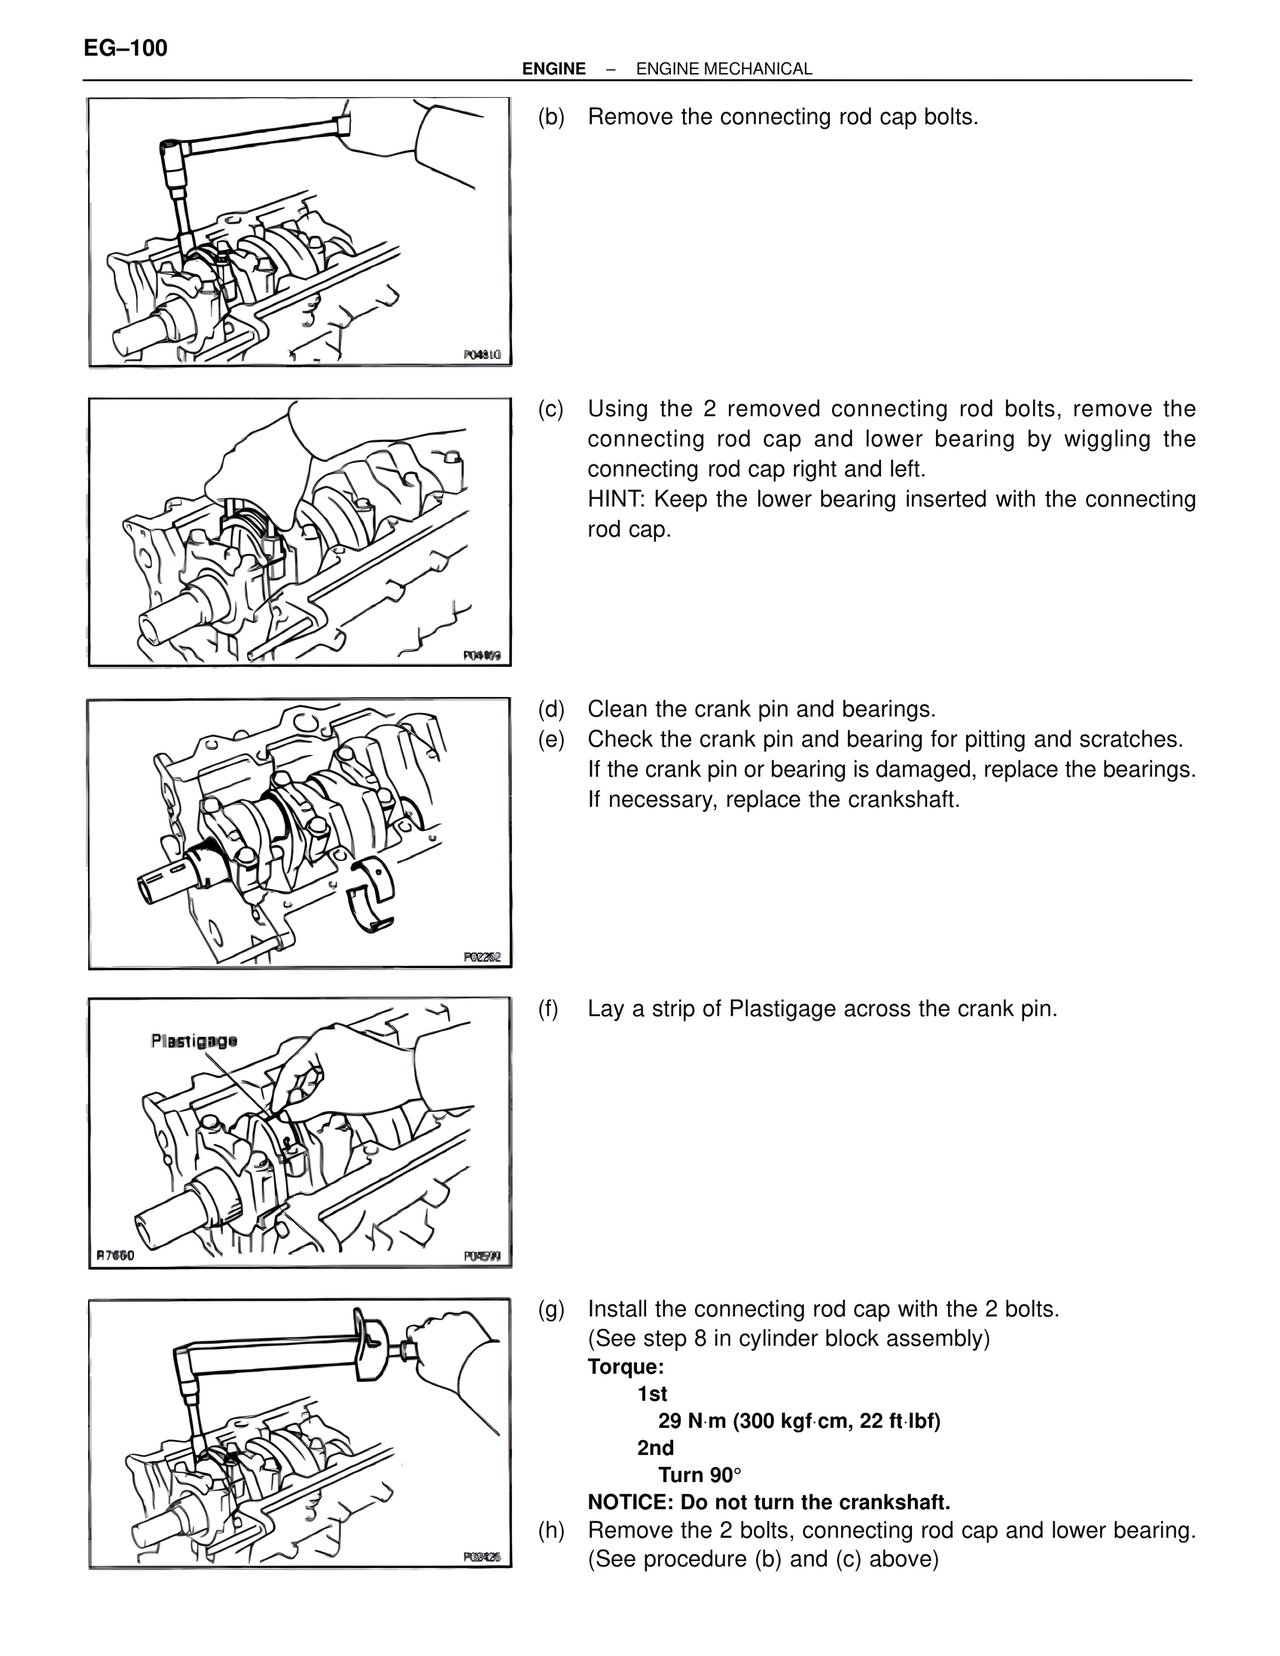
(b) Remove the connecting rod cap bolts.
P04810
(c) Using the 2 removed connecting rod bolts, remove the
connecting rod cap and lower bearing by wiggling the
connecting rod cap right and left.
HINT: Keep the lower bearing inserted with the connecting
rod cap.
P04499
(d) Clean the crank pin and bearings.
(e) Check the crank pin and bearing for pitting and scratches.
If the crank pin or bearing is damaged, replace the bearings.
If necessary, replace the crankshaft.
P02262
(f) Lay a strip of Plastigage across the crank pin.
Plastigage
R74660
P04599
(g) Install the connecting rod cap with the 2 bolts.
(See step 8 in cylinder block assembly)
Torque:
1st
29 N·m (300 kgf·cm, 22 ft·lbf)
2nd
Turn 90°
NOTICE: Do not turn the crankshaft.
(h) Remove the 2 bolts, connecting rod cap and lower bearing.
(See procedure (b) and (c) above)
P02426