INTRODUCTION
IN-3
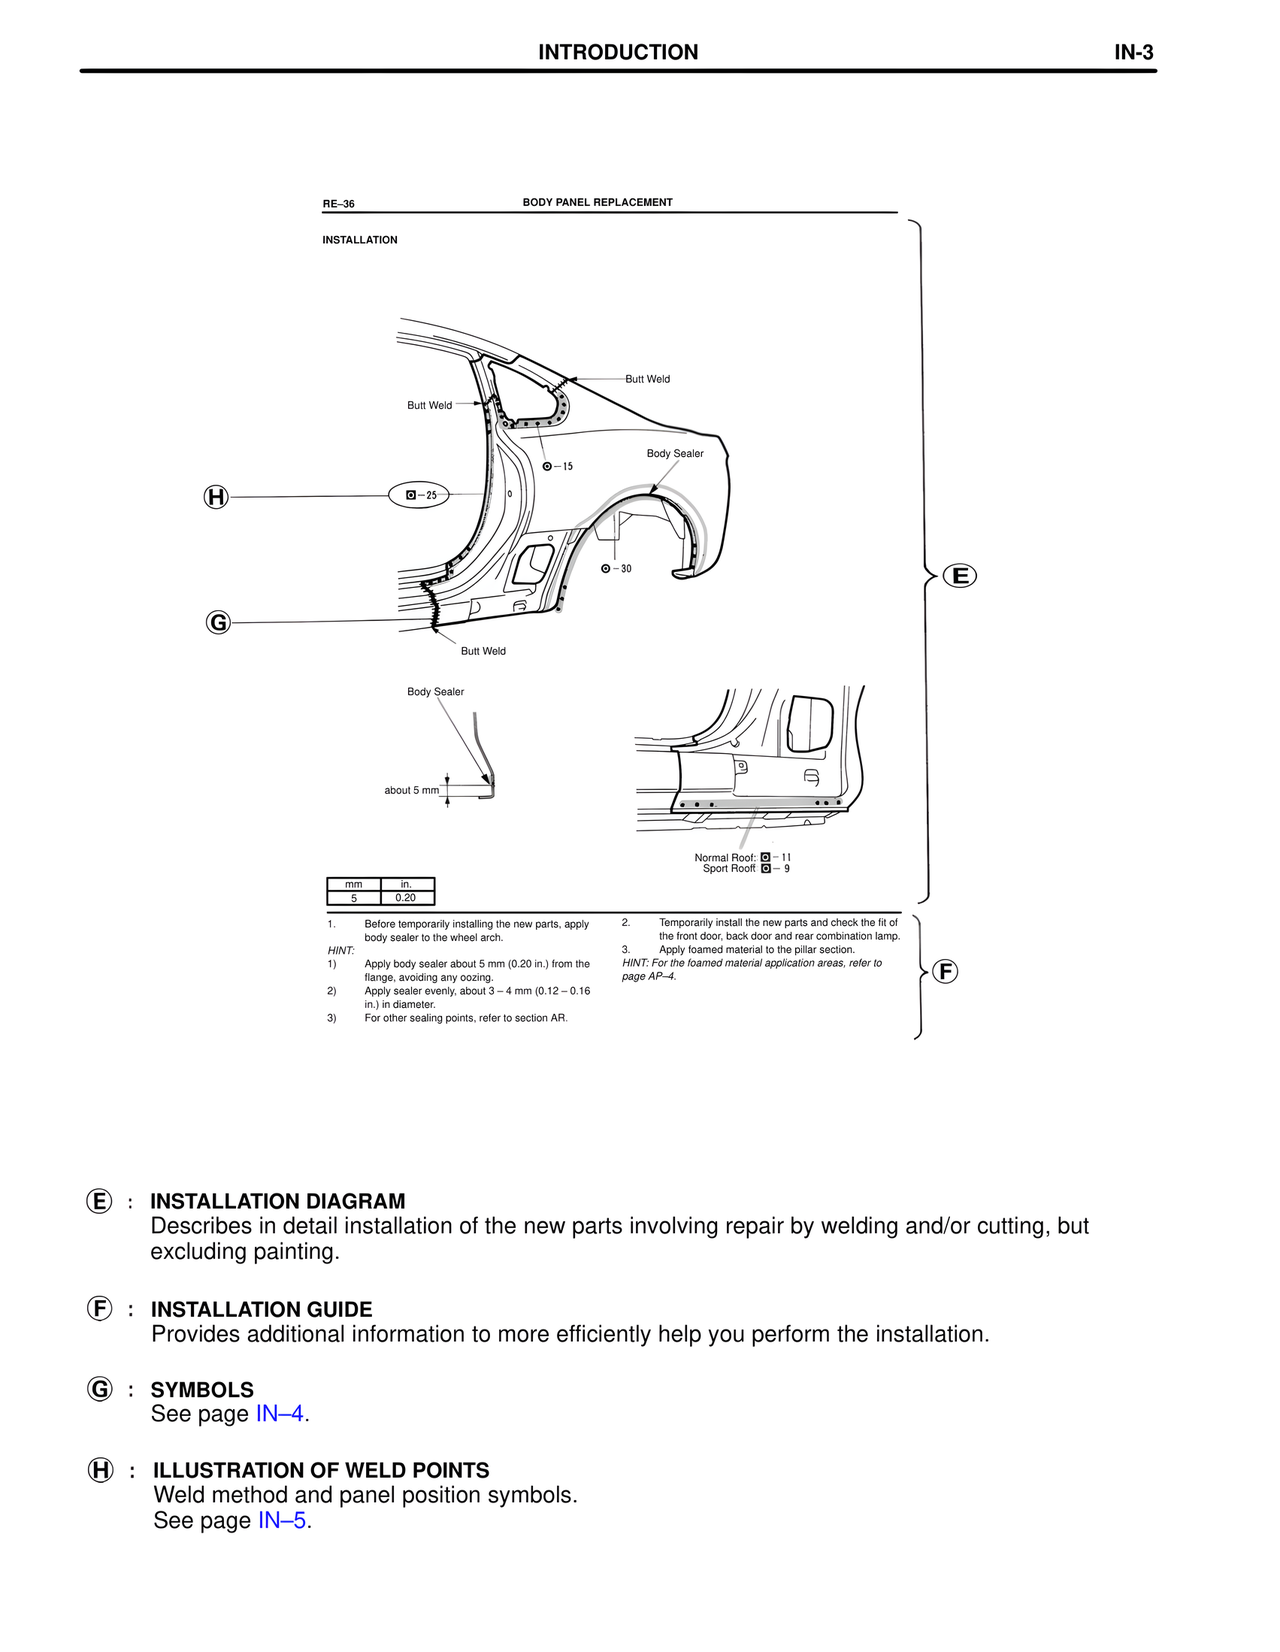
RE–36
BODY PANEL REPLACEMENT
INSTALLATION
Butt Weld
Butt Weld
Body Sealer
ⓞ–15
ⓧ–25
ⓞ–30
Butt Weld
Body Sealer
about 5 mm
Normal Roof: ⓧ–11
Sport Roof: ⓧ–9
mm in.
5 0.20
1. Before temporarily installing the new parts, apply body sealer to the wheel arch.
HINT:
1) Apply body sealer about 5 mm (0.20 in.) from the flange, avoiding any oozing.
2) Apply sealer evenly, about 3–4 mm (0.12–0.16 in.) in diameter.
3) For other sealing points, refer to section AR.
2. Temporarily install the new parts and check the fit of the front door, back door and rear combination lamp.
3. Apply foamed material to the pillar section.
HINT: For the foamed material application areas, refer to page AP–4.
E : INSTALLATION DIAGRAM
Describes in detail installation of the new parts involving repair by welding and/or cutting, but excluding painting.
F : INSTALLATION GUIDE
Provides additional information to more efficiently help you perform the installation.
G : SYMBOLS
See page IN–4.
H : ILLUSTRATION OF WELD POINTS
Weld method and panel position symbols.
See page IN–5.