VALVE CLEARANCE INSPECTION AND ADJUSTMENT (2JZ–GE)
HINT: Inspect and adjust the valve clearance when the engine is cold.
1. REMOVE THROTTLE BODY AND INTAKE AIR CONNECTOR ASSEMBLY
(See steps 1 to 9 in injector removal in SFI System)
2. DISCONNECT HIGH–TENSION CORDS FROM CYLINDER HEAD COVERS
(See high–tension cords and cord clamps removal in Ignition System)
3. REMOVE NO.3, NO.1 AND NO.2 CYLINDER HEAD COVERS
(a) Remove the 4 bolts, 4 nuts and No.3 cylinder head cover.
(b) Remove the 4 bolts, No.1 cylinder head cover and gasket.
(c) Remove the 4 bolts, No.2 cylinder head cover and gasket.
4. SET NO.1 CYLINDER TO TDC/COMPRESSION
(a) Turn the crankshaft pulley, and align its groove with timing mark "O" of the No.1 timing belt cover.
NOTICE: Always turn the crankshaft clockwise.
(b) Check that the timing marks of the camshaft timing pulleys are aligned with the timing marks of the No.4 timing belt cover.
If not, turn the crankshaft 1 revolution (360˚).
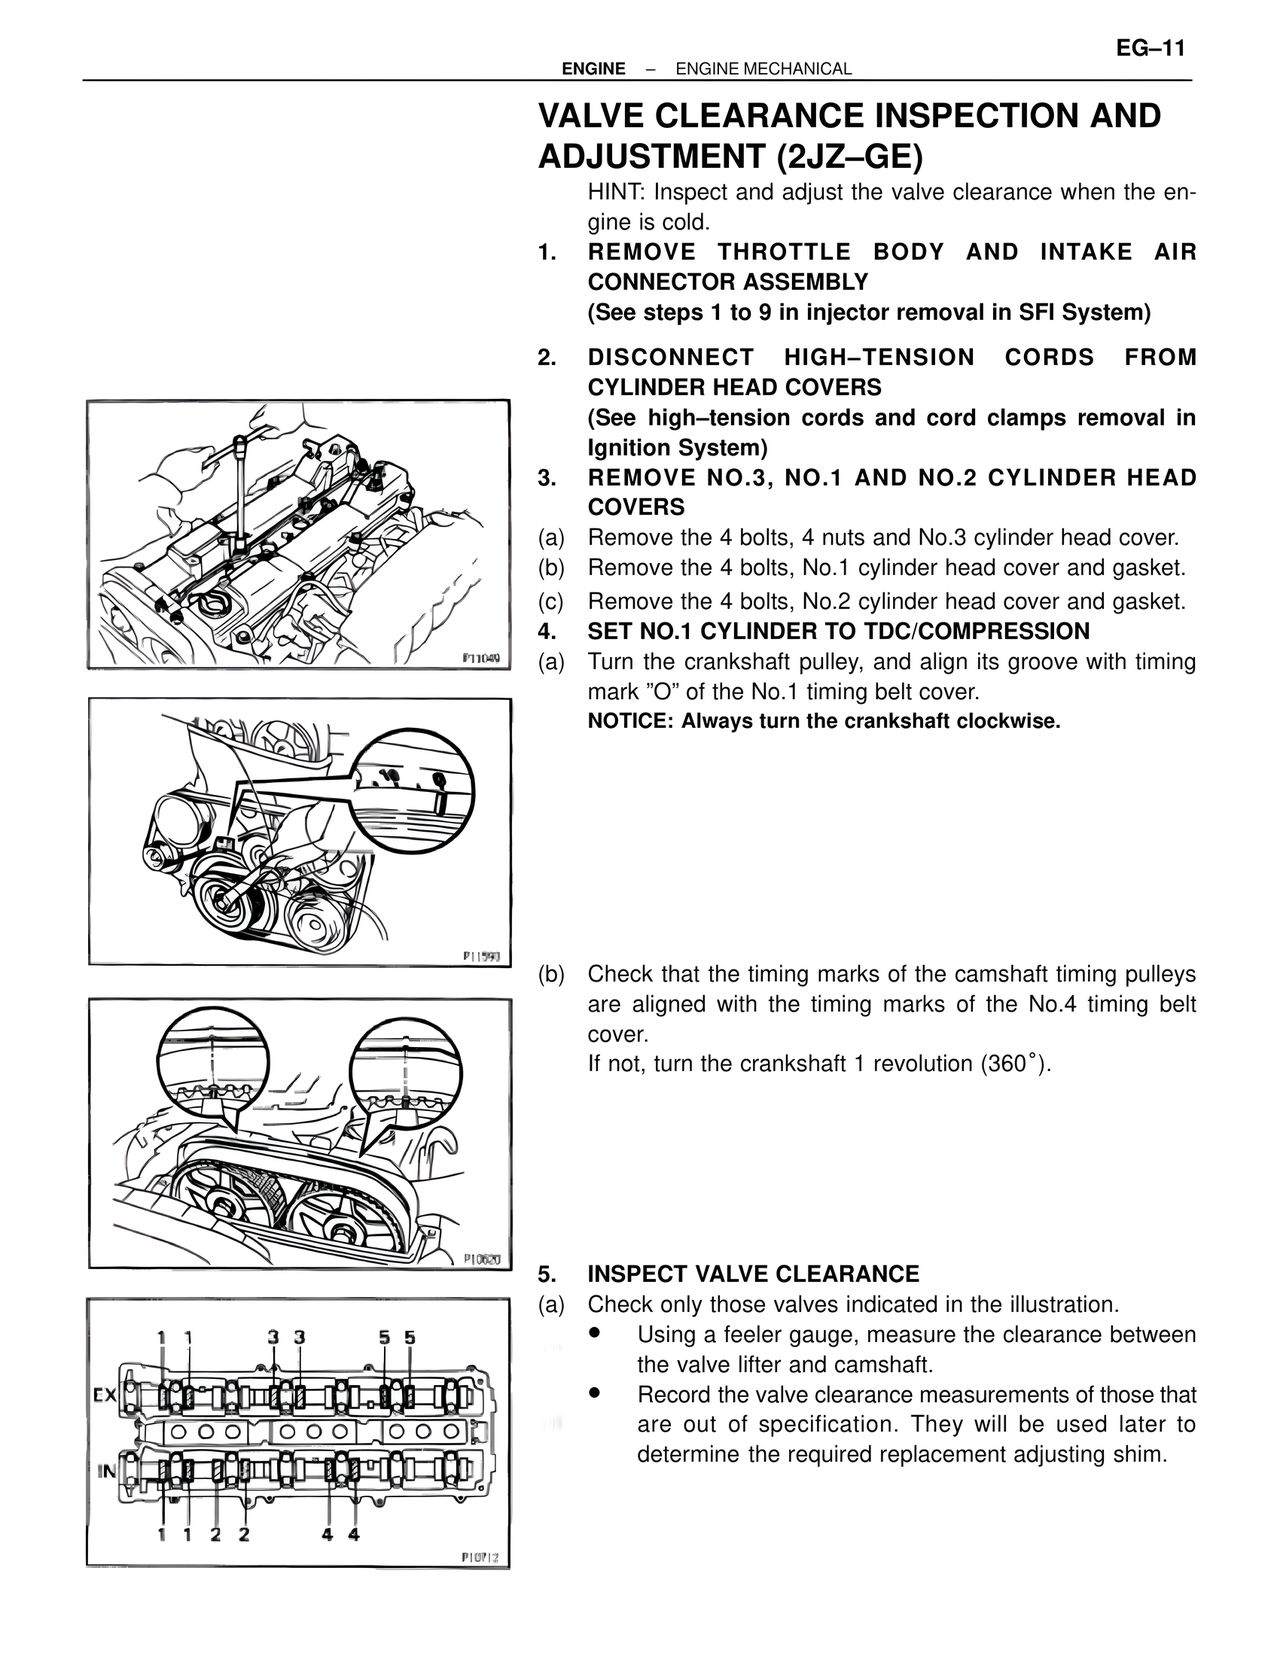
5. INSPECT VALVE CLEARANCE
(a) Check only those valves indicated in the illustration.
• Using a feeler gauge, measure the clearance between the valve lifter and camshaft.
• Record the valve clearance measurements of those that are out of specification. They will be used later to determine the required replacement adjusting shim.
P11049
P11593
P10620
P10712
1 1 3 3 5 5
EX
IN
1 1 2 2 4 4